Welcome to Your Getting Started Manual
Whether you're brand new to NeurOptimal® or simply need a refresher, this interactive guide walks you through everything you need to begin confidently. From setting up your system to applying sensors and running Sessions, each section is easy to navigate and supported by video tutorials. You’ll also find tips, tools, and resources to help you track progress and deepen your understanding. Let’s get started — one step at a time.
Disclaimer:
The official language of the NeurOptimal® software and Zengar Institute Inc. materials is English. This manual may be translated using an automated tool for convenience. These translations are not guaranteed to be accurate and may contain errors. Zengar Institute Inc. is not responsible for any discrepancies or misinterpretations arising from translated content.
Part 1 Set Up
Connecting the Hardware
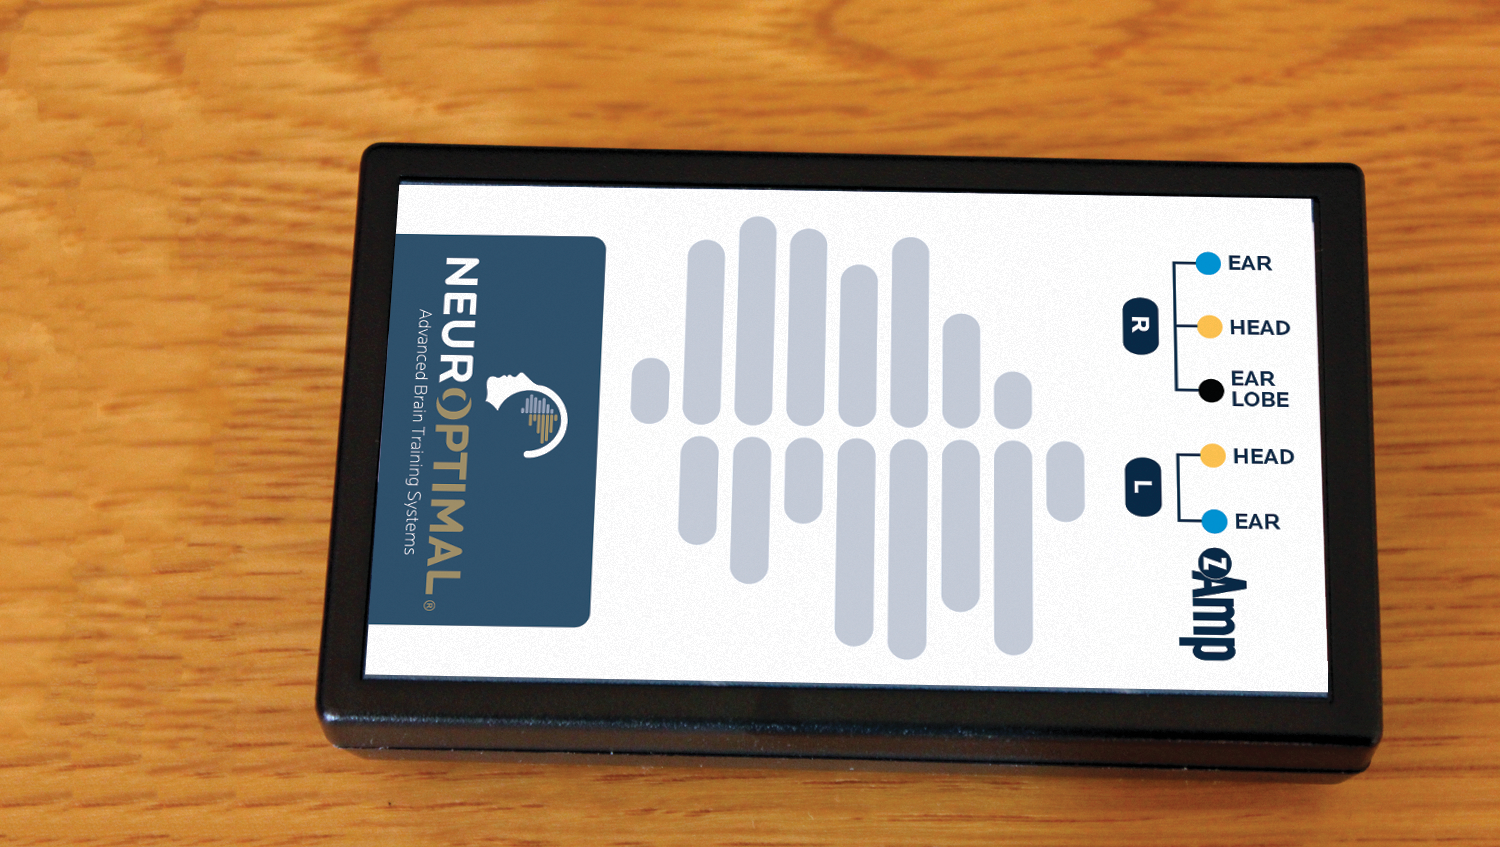
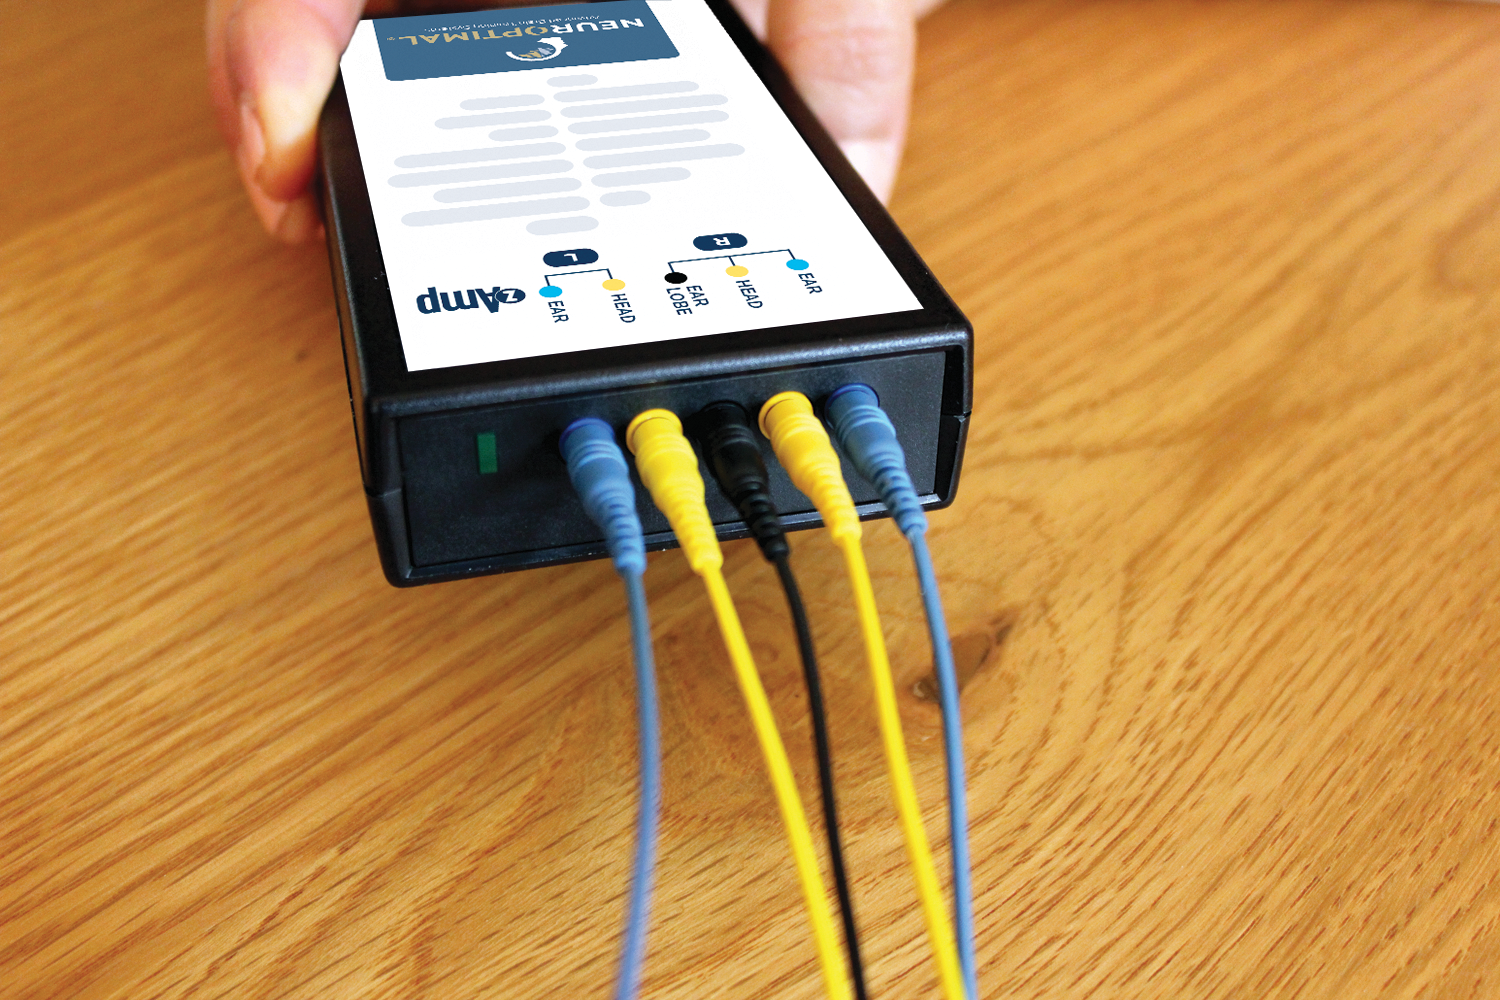
1. Find the zAmp.
2. Find the USB cable.
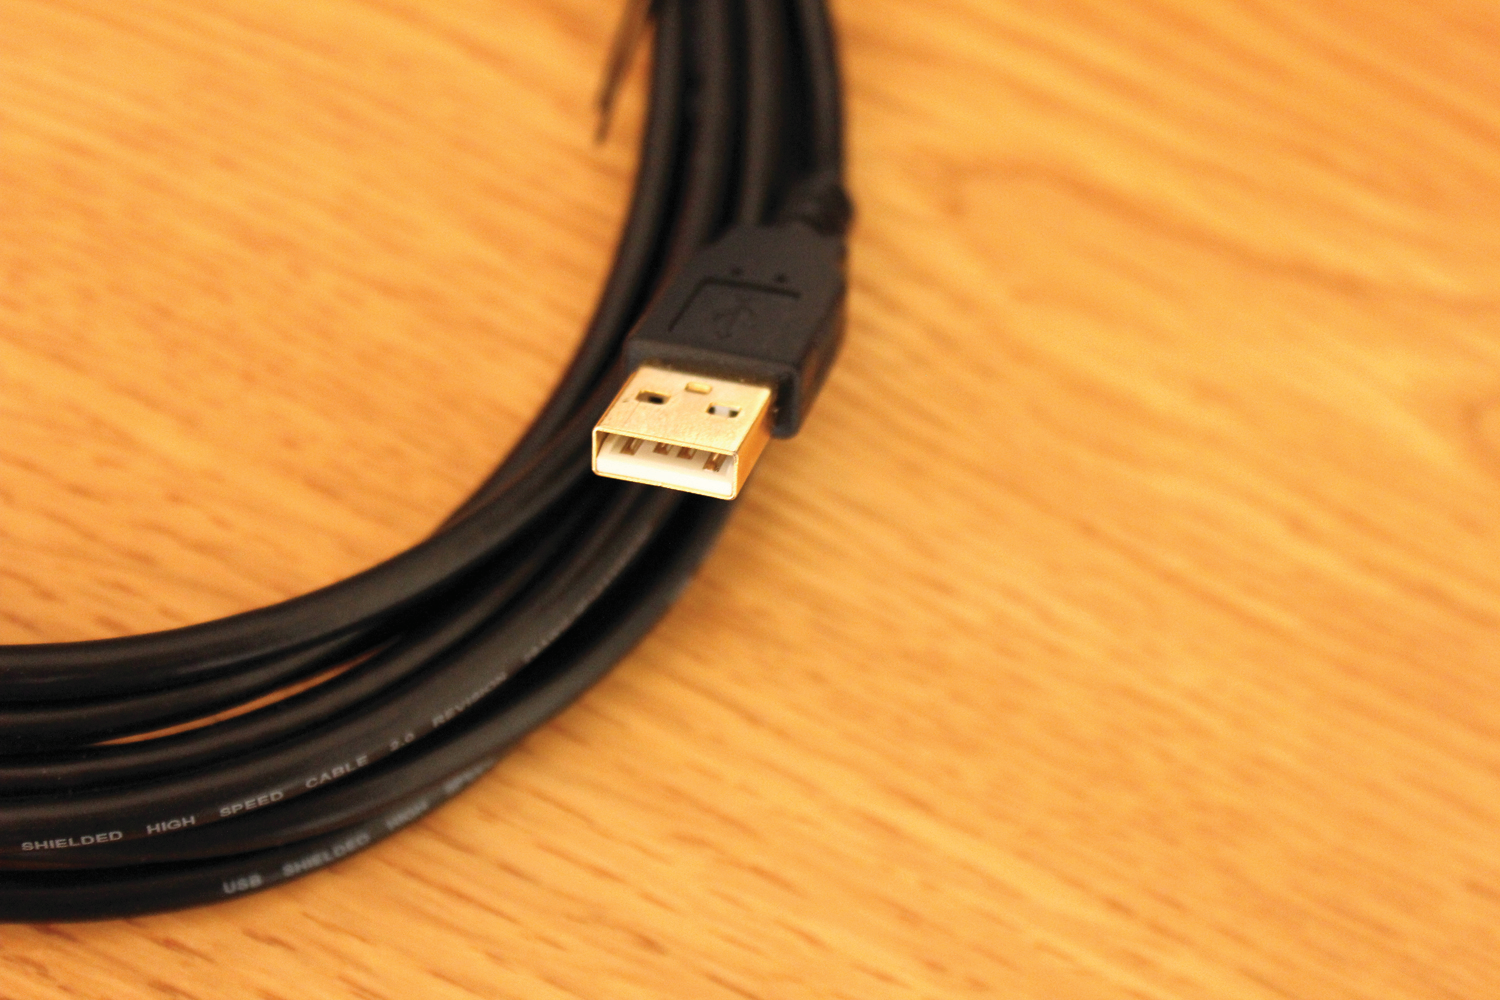
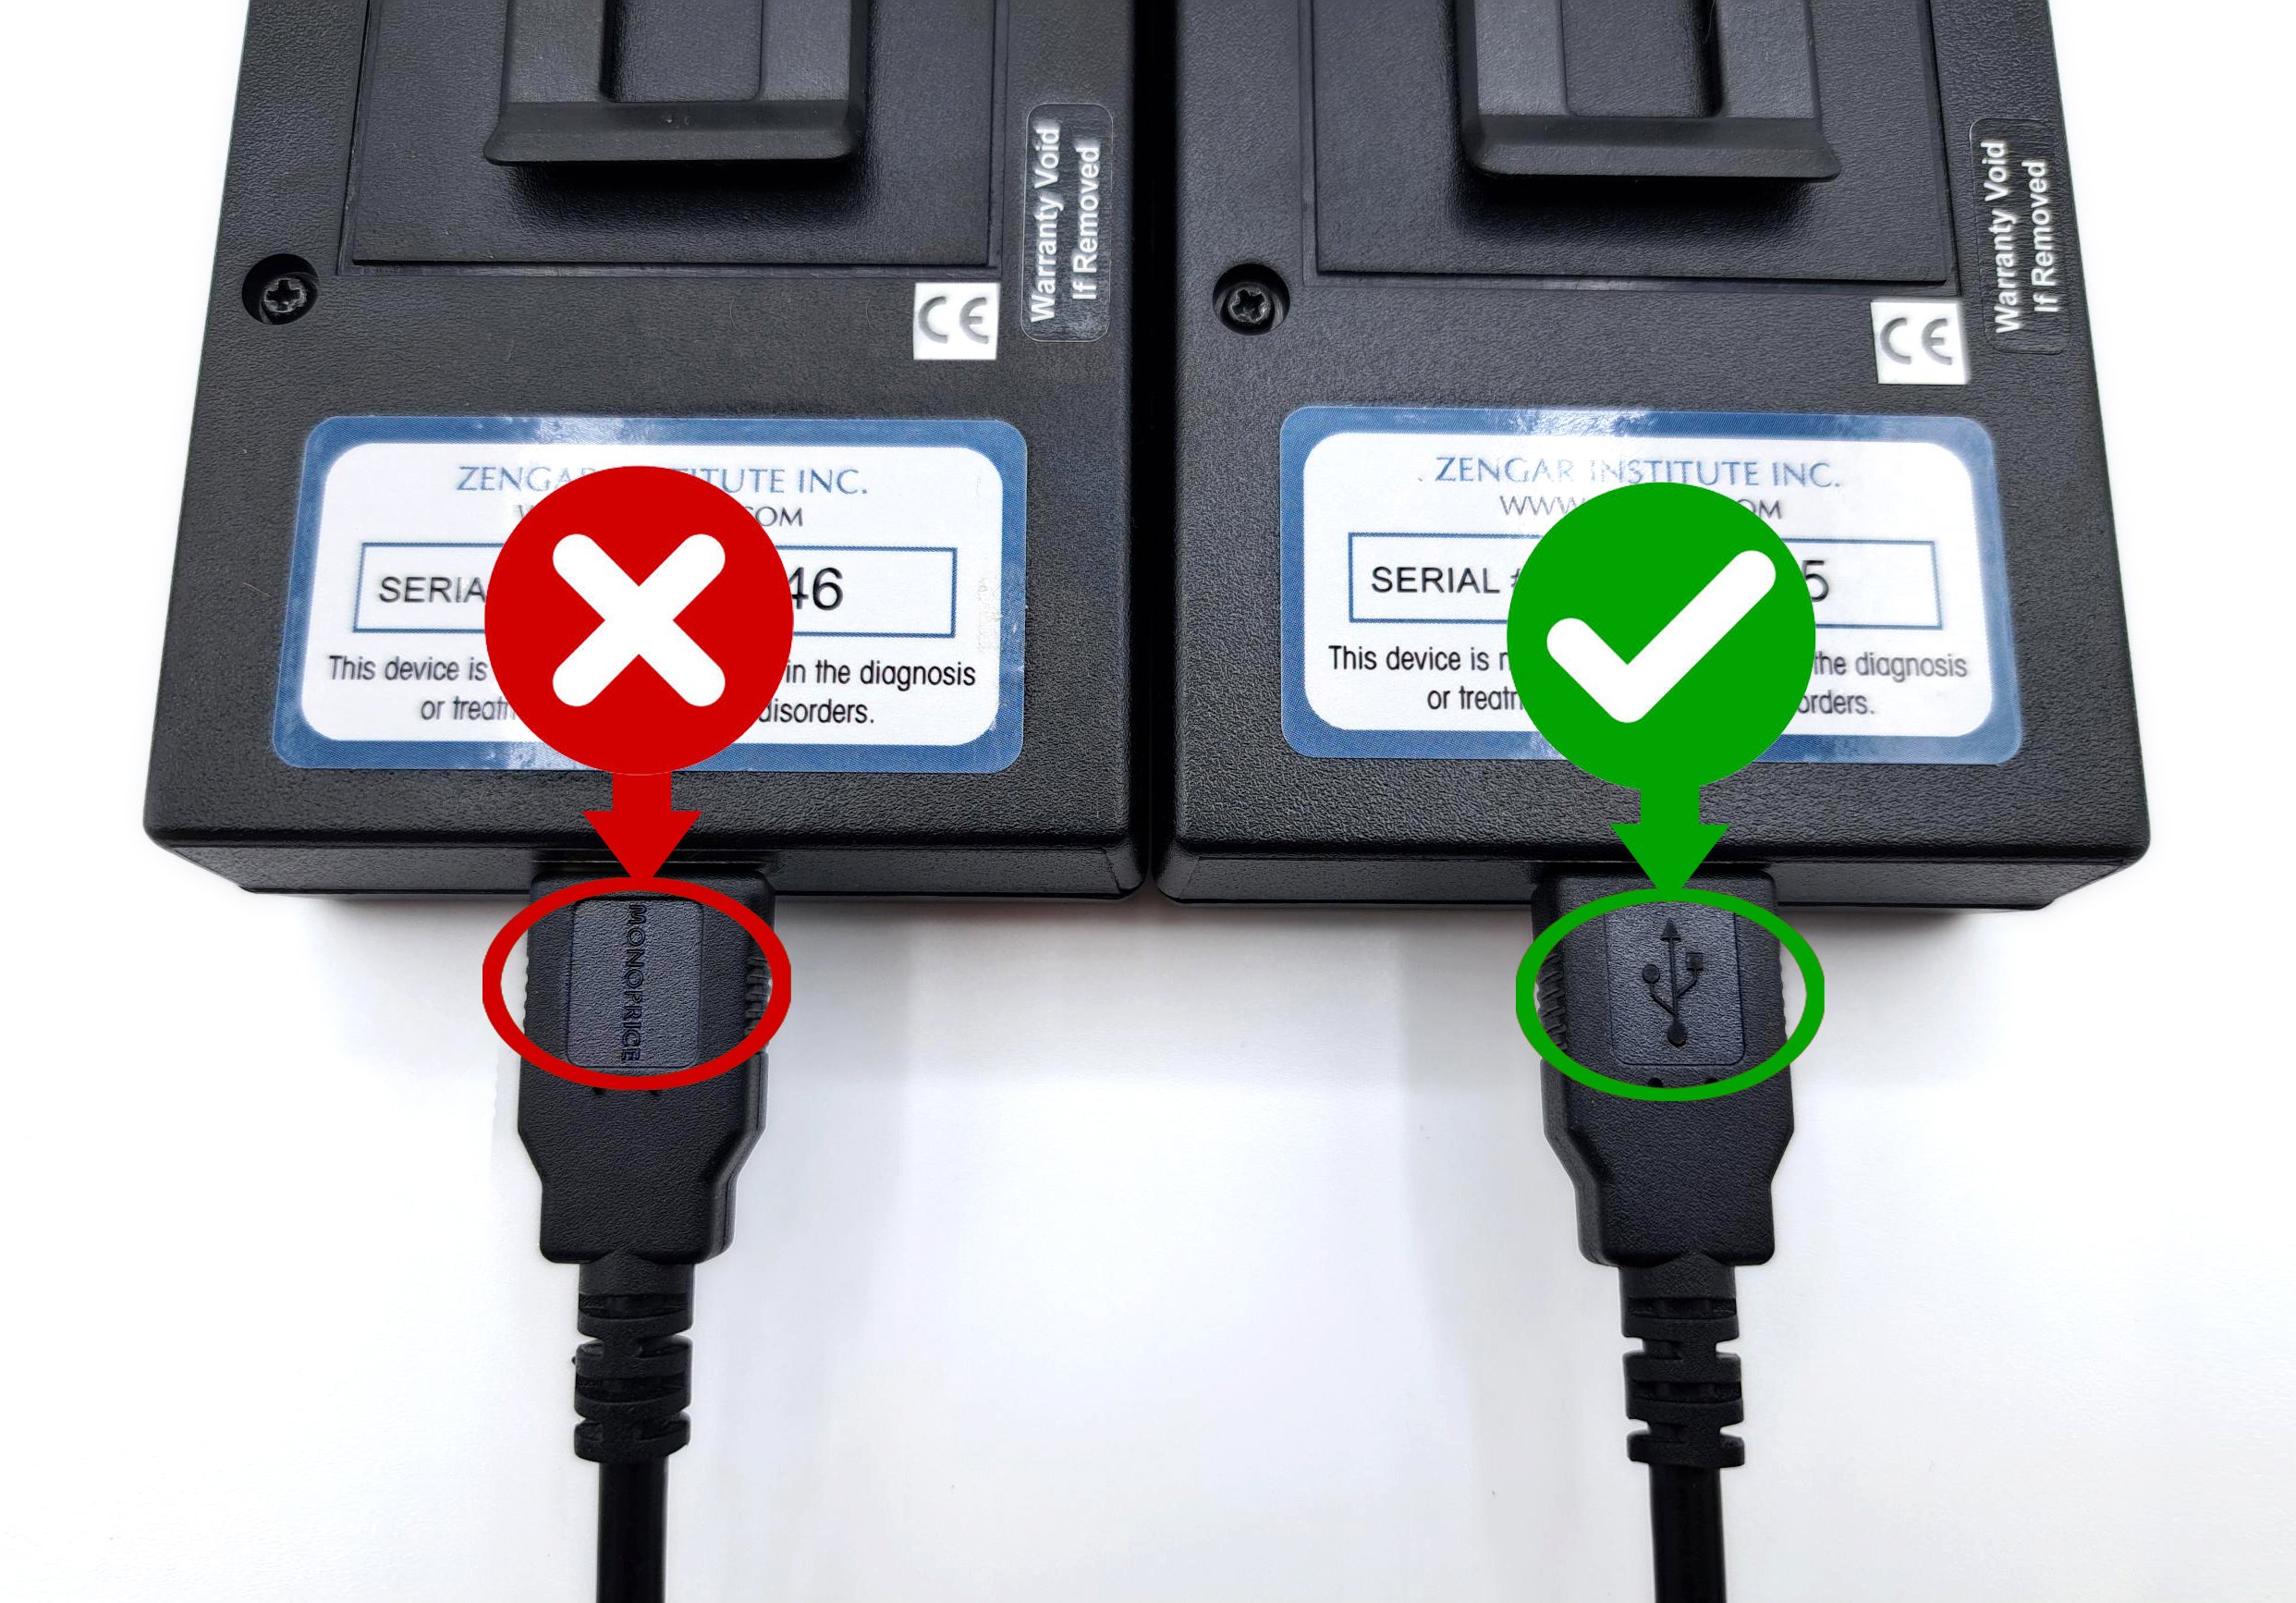
3. Connect the USB cable into the zAmp.
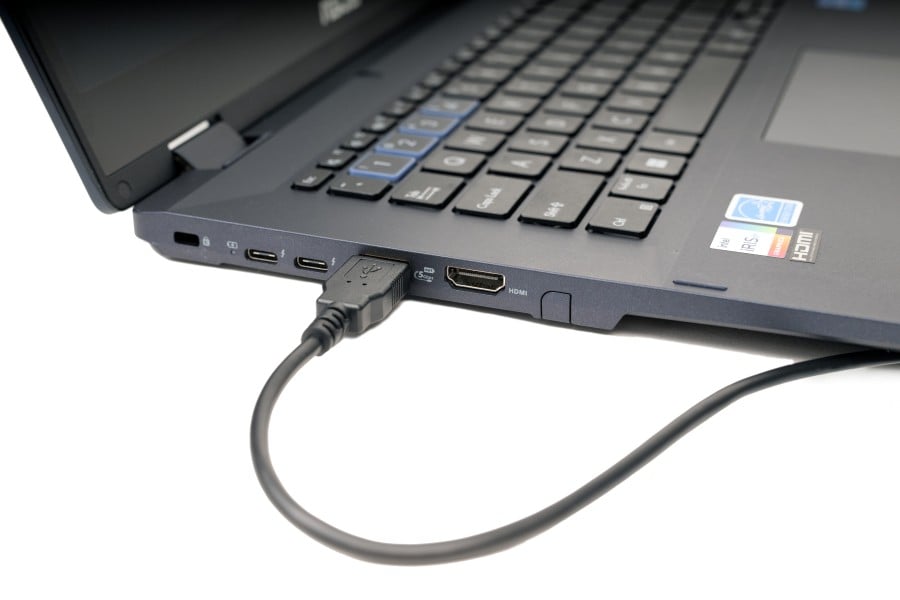
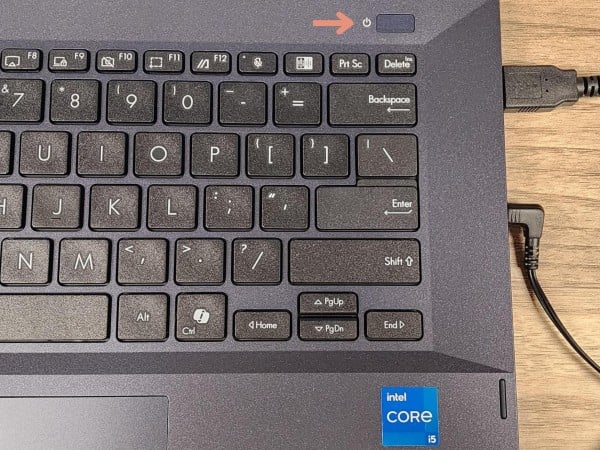
4. Insert the USB cable into the USB port on the system.
5. Find and remove colored wire sensors from packaging.
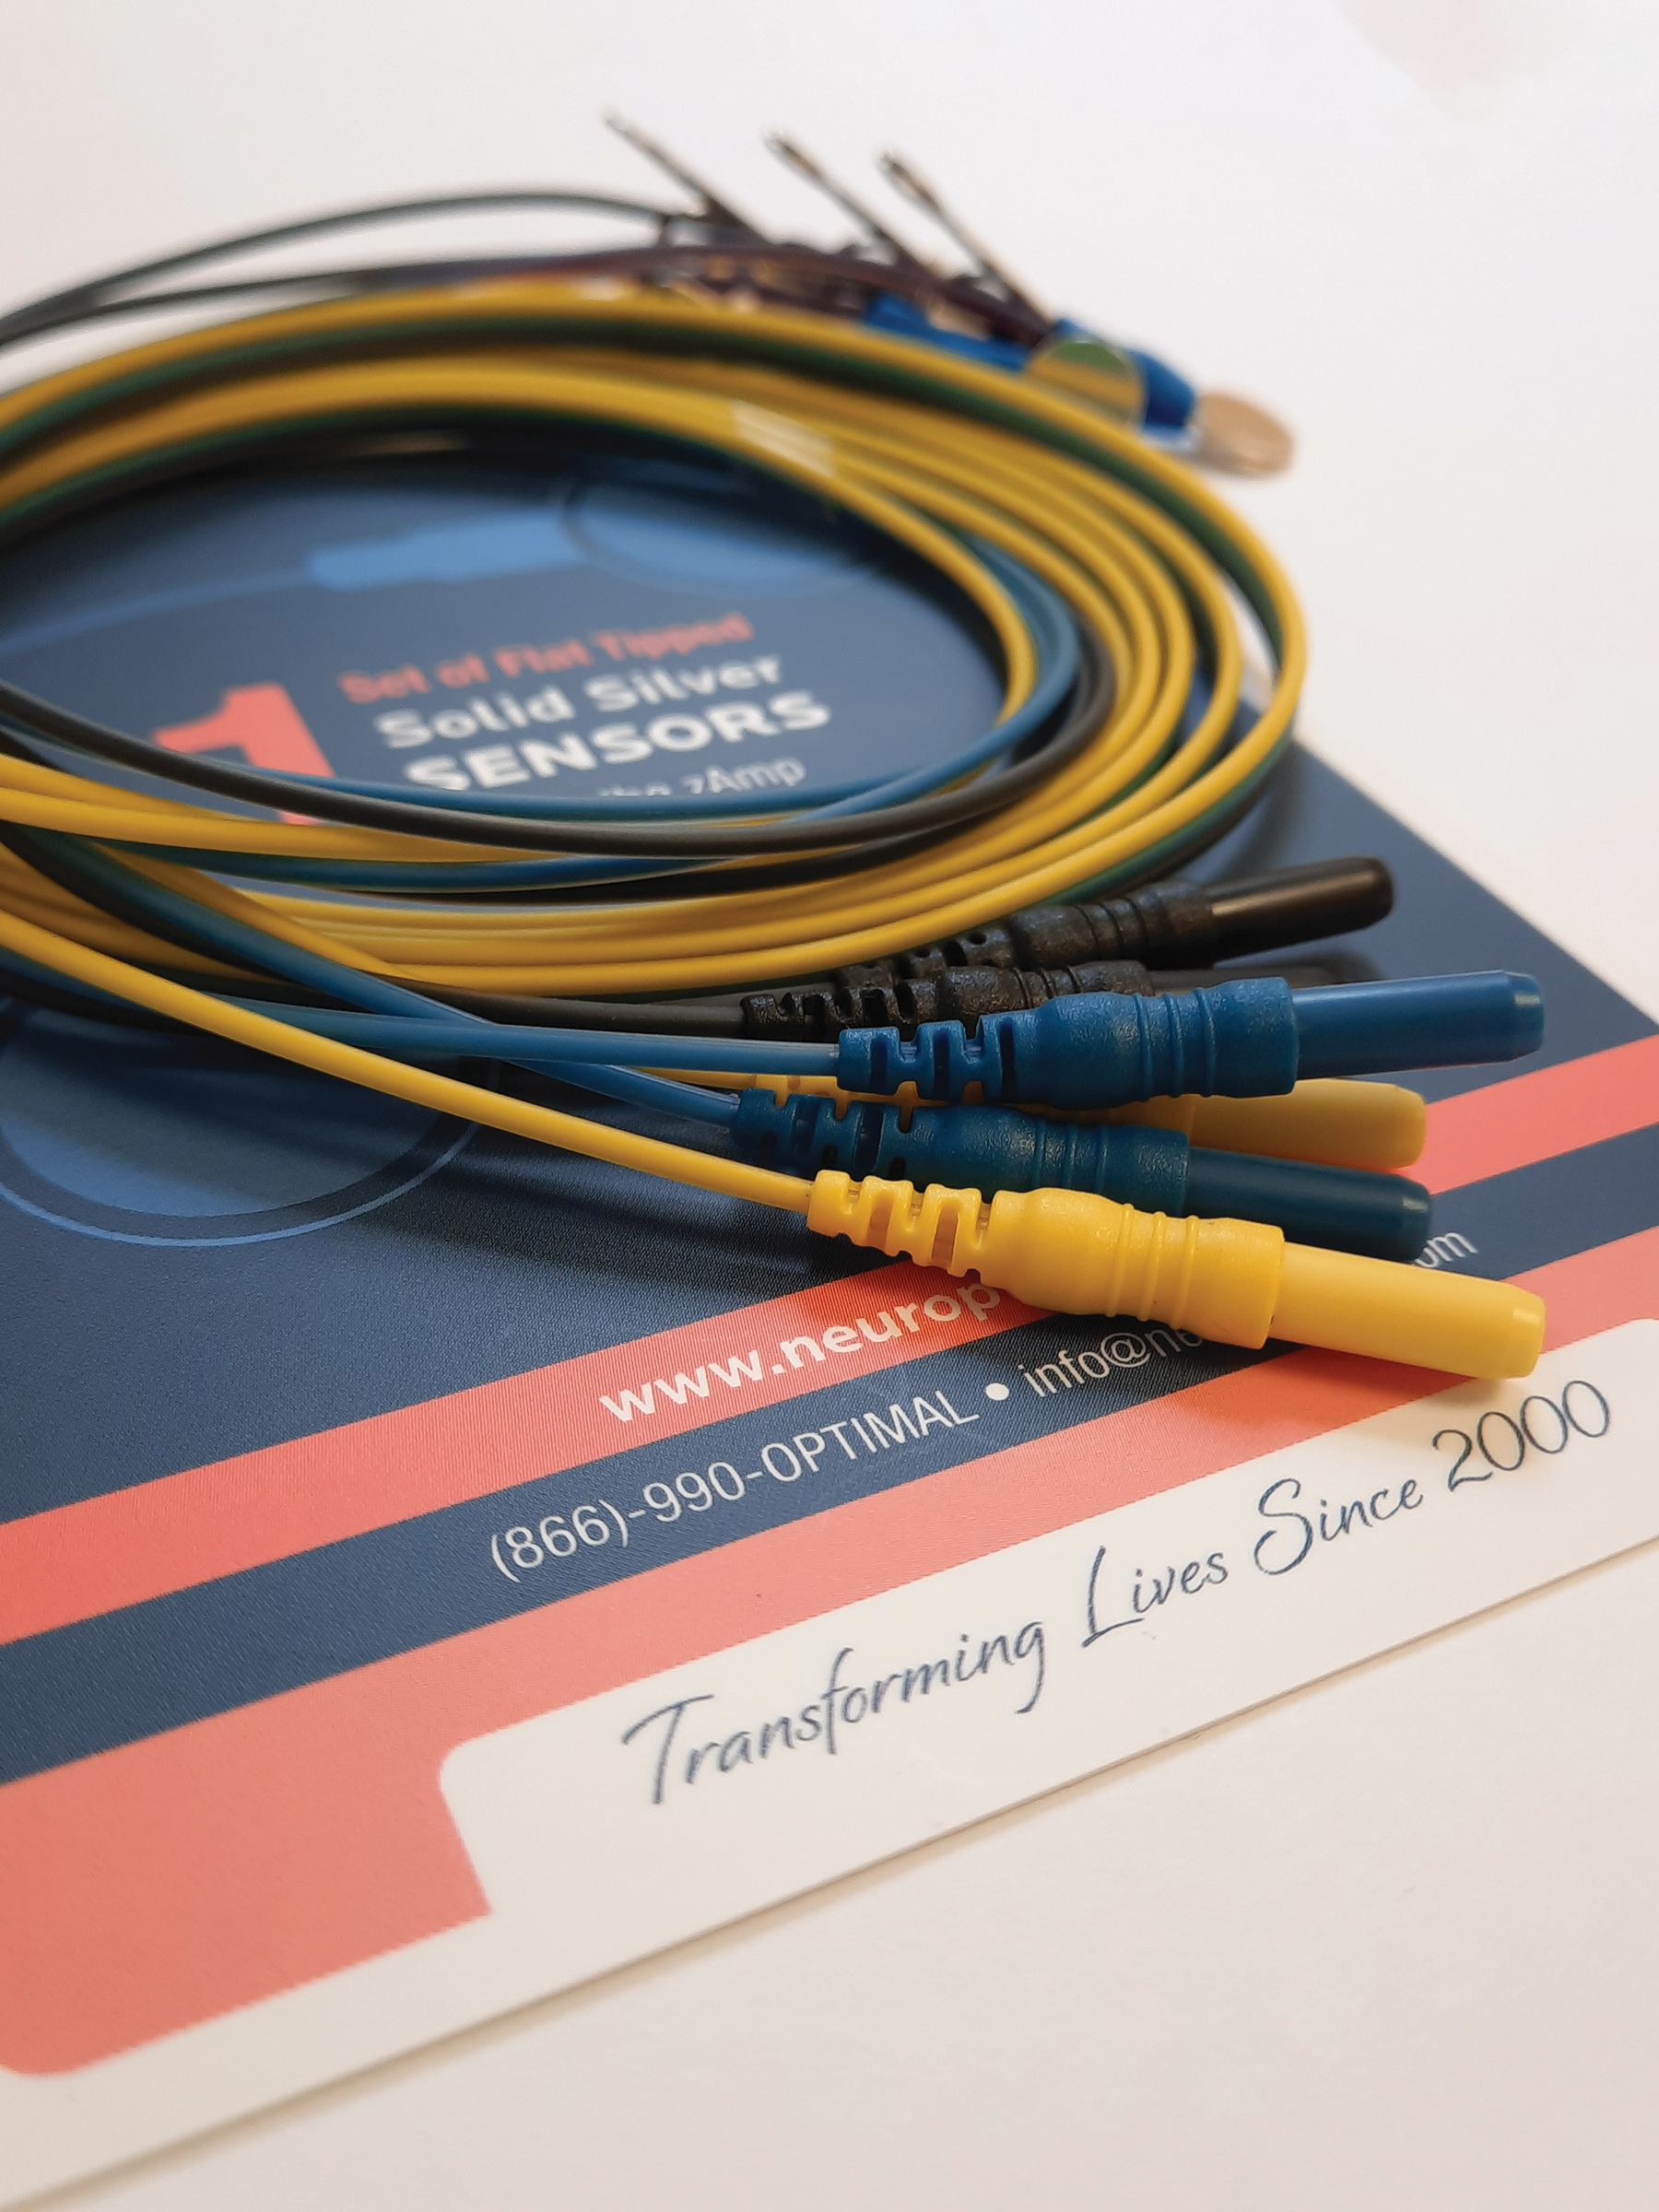
6. Firmly connect the colored sensors to the zAmp by plugging them into the color-coded inputs (note the right side has three wires).

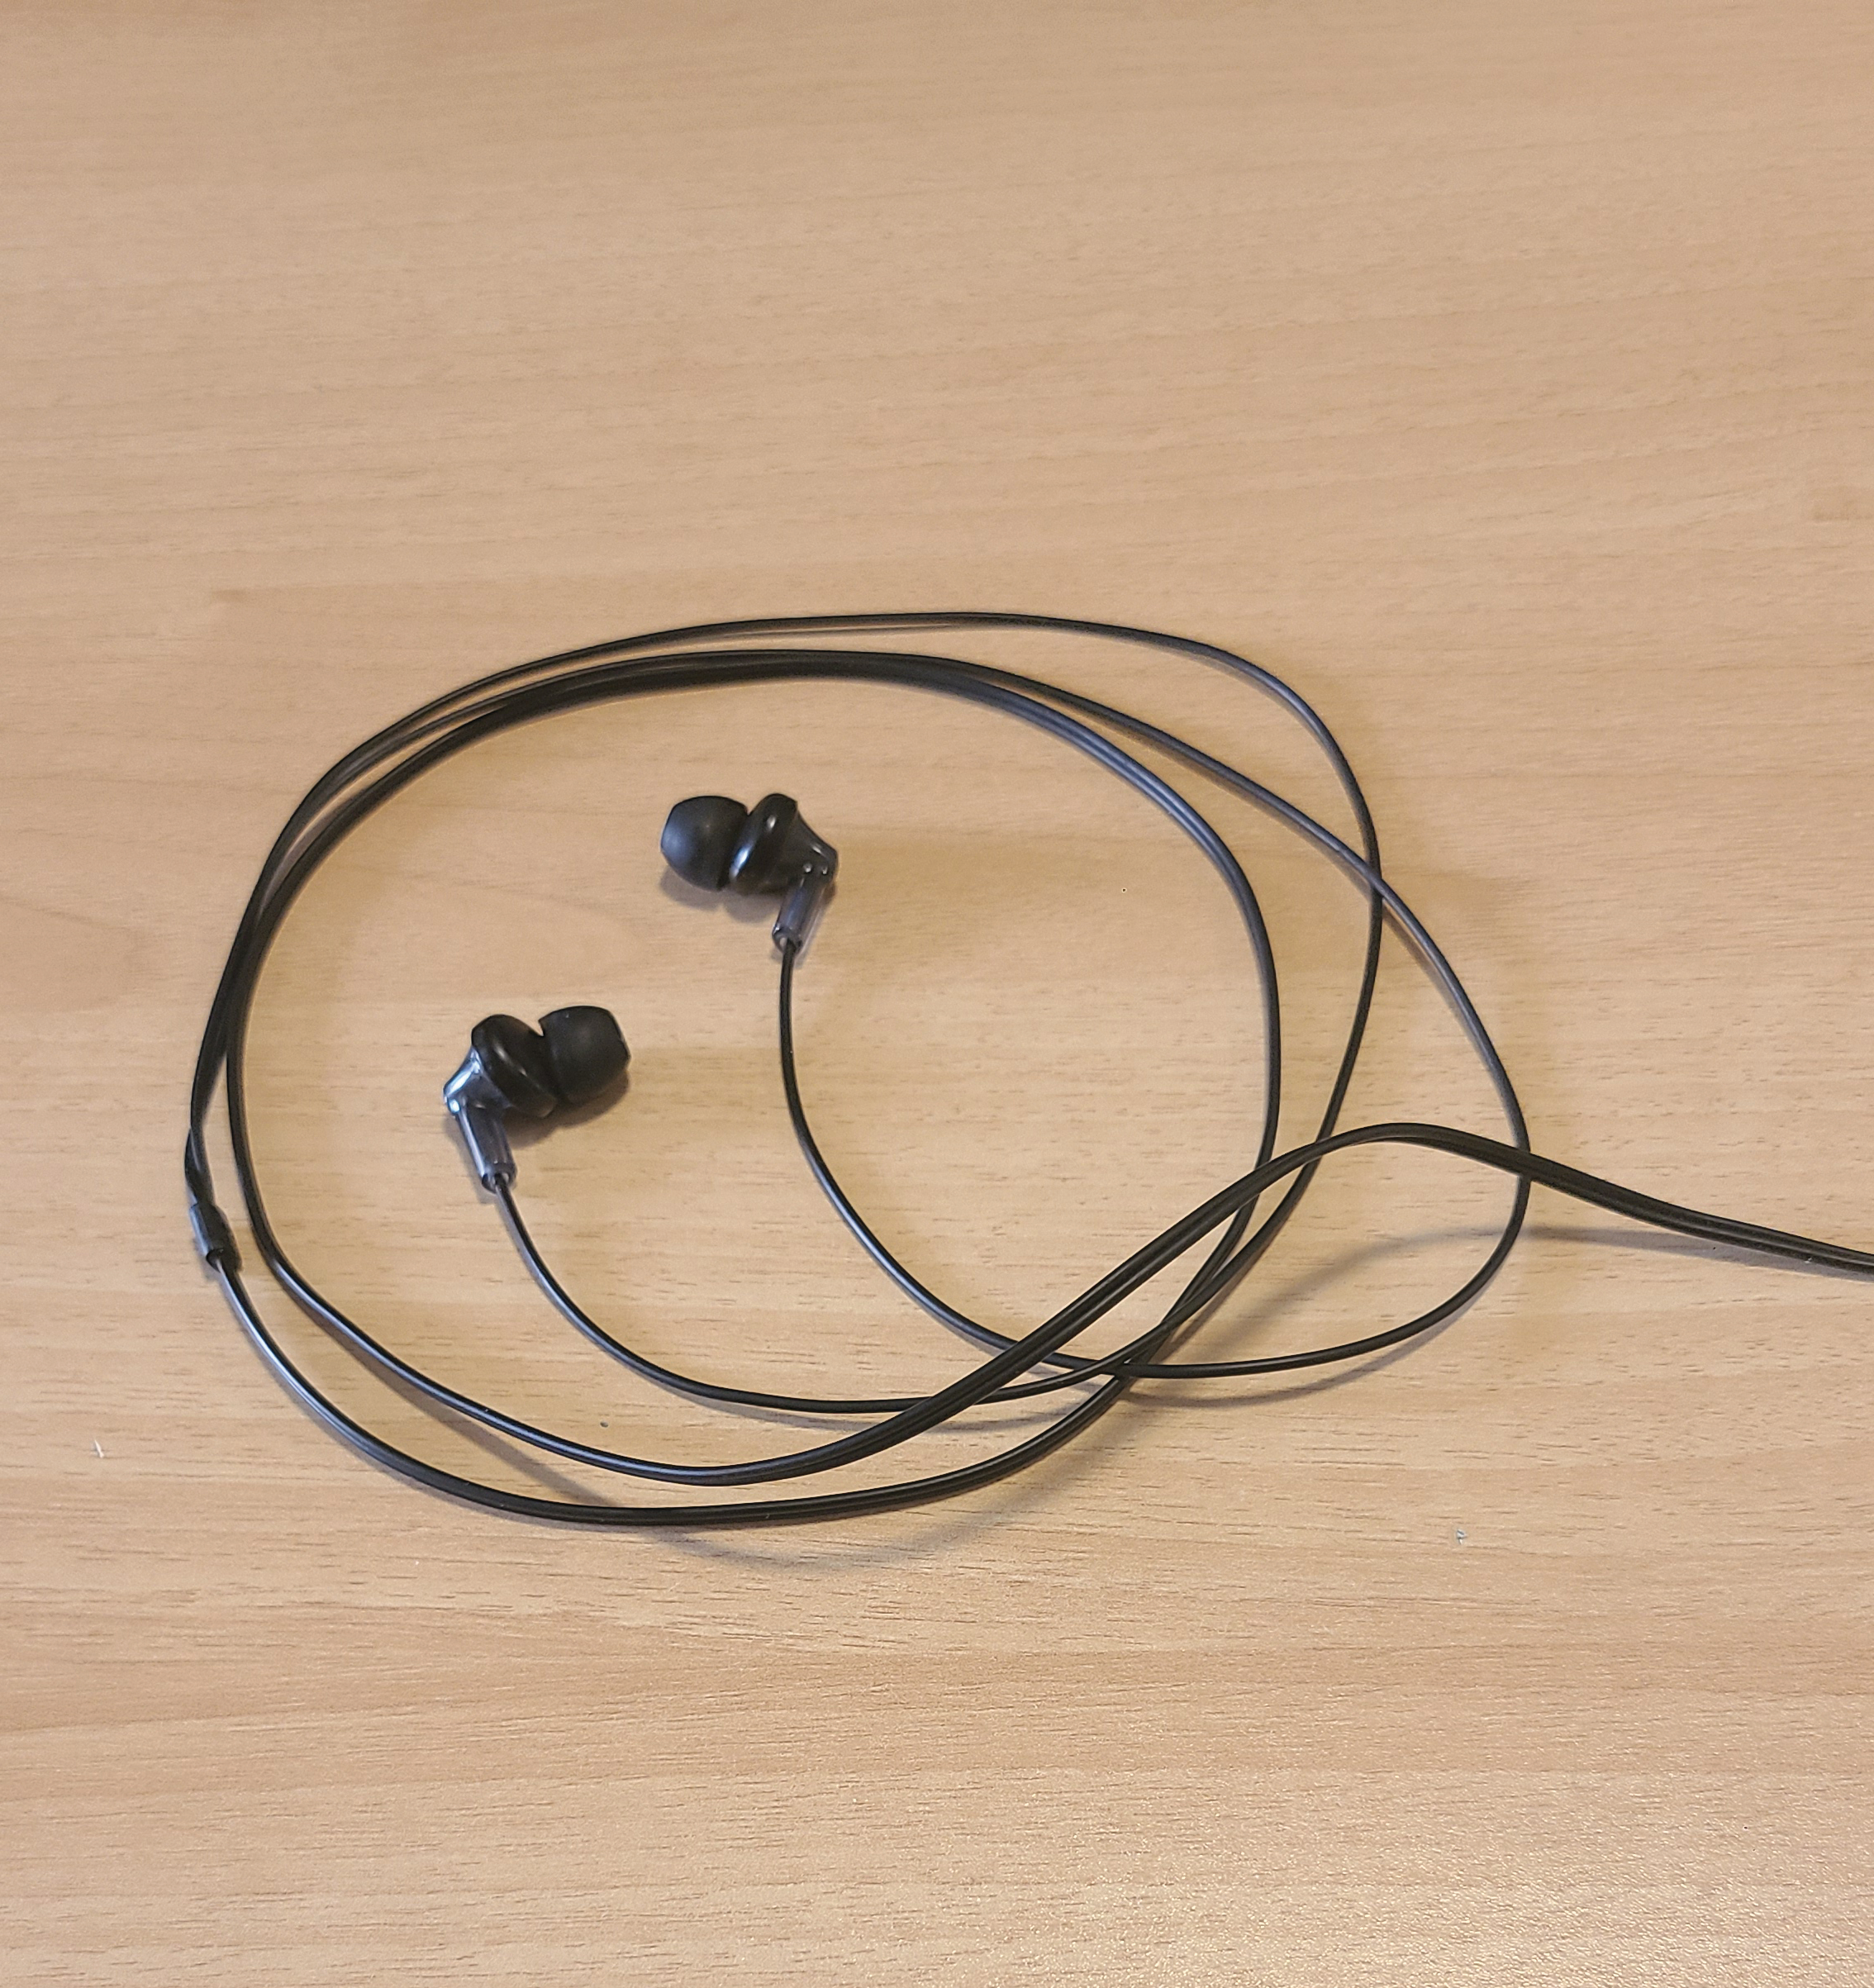
7. Find and remove the earbuds from their packaging and connect them to the system.
8. Press the power button in the top-right corner to turn on the system.
Part 1 Set Up
Connecting to Wi-Fi
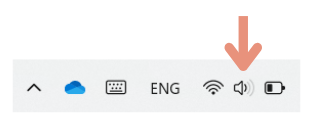
1. Click or tap on the Wi-Fi icon found at the bottom right of your screen.

2. Select available networks.
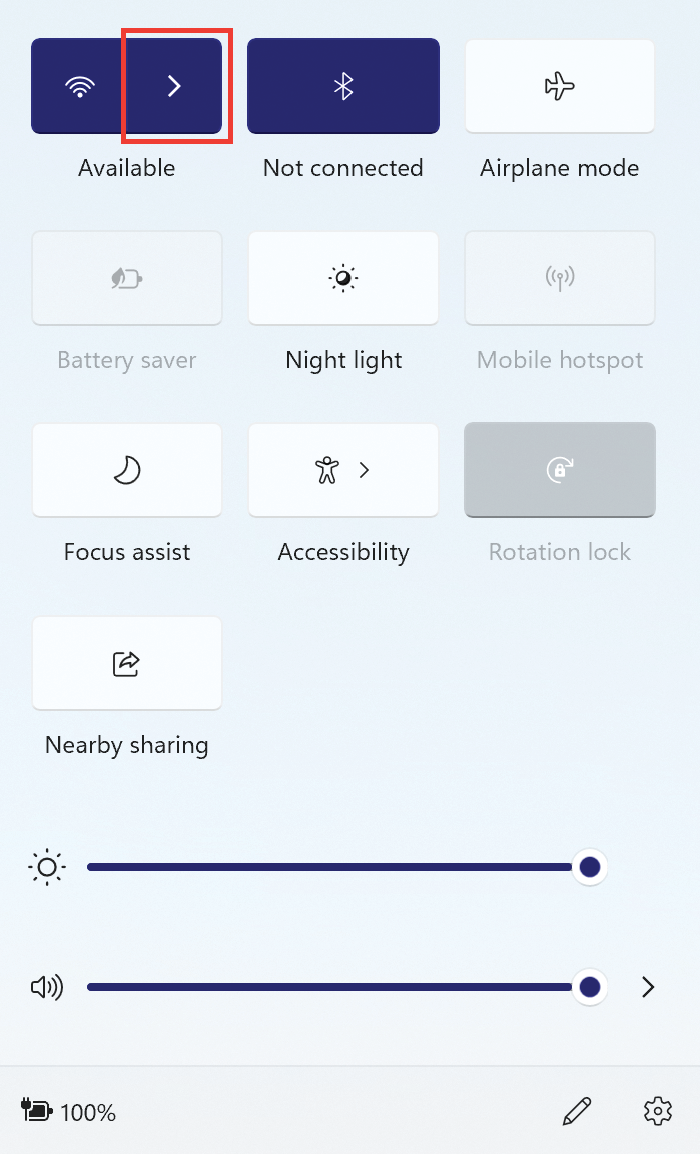
3. Choose your Wi-Fi network from the list and tap on it.
4. Select Connect Automatically so it connects each time the system is on and in range.
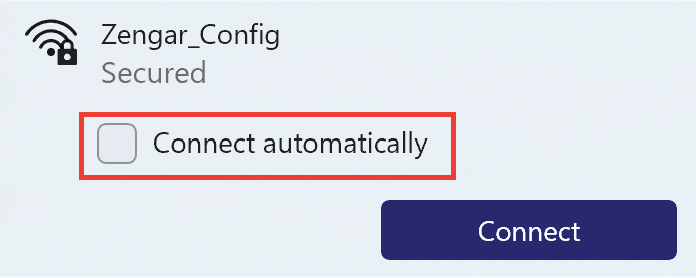
5. Tap Connect.

6. Enter the Wi-Fi password, tap Next and wait for the connection to be established.
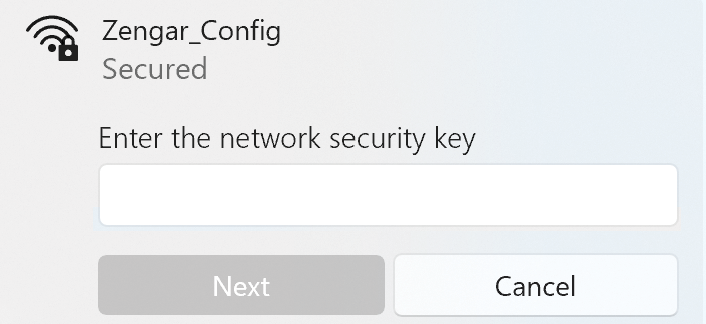
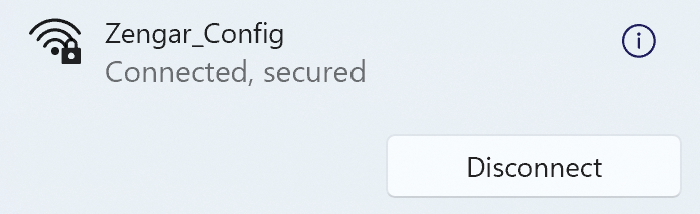
7. When it says Connected, you are successfully online.
 IMPORTANT!
NeurOptimal® requires an internet connection to authenticate your software license at least once every 7 days. If your system has not connected in over 7 days, it will need to be connected the next time NeurOptimal® is launched in order to function. Zengar® recommends having a constant internet connection so that your system can receive crucial Windows and NeurOptimal® updates regularly.
Applying the Sensors
 Watch video
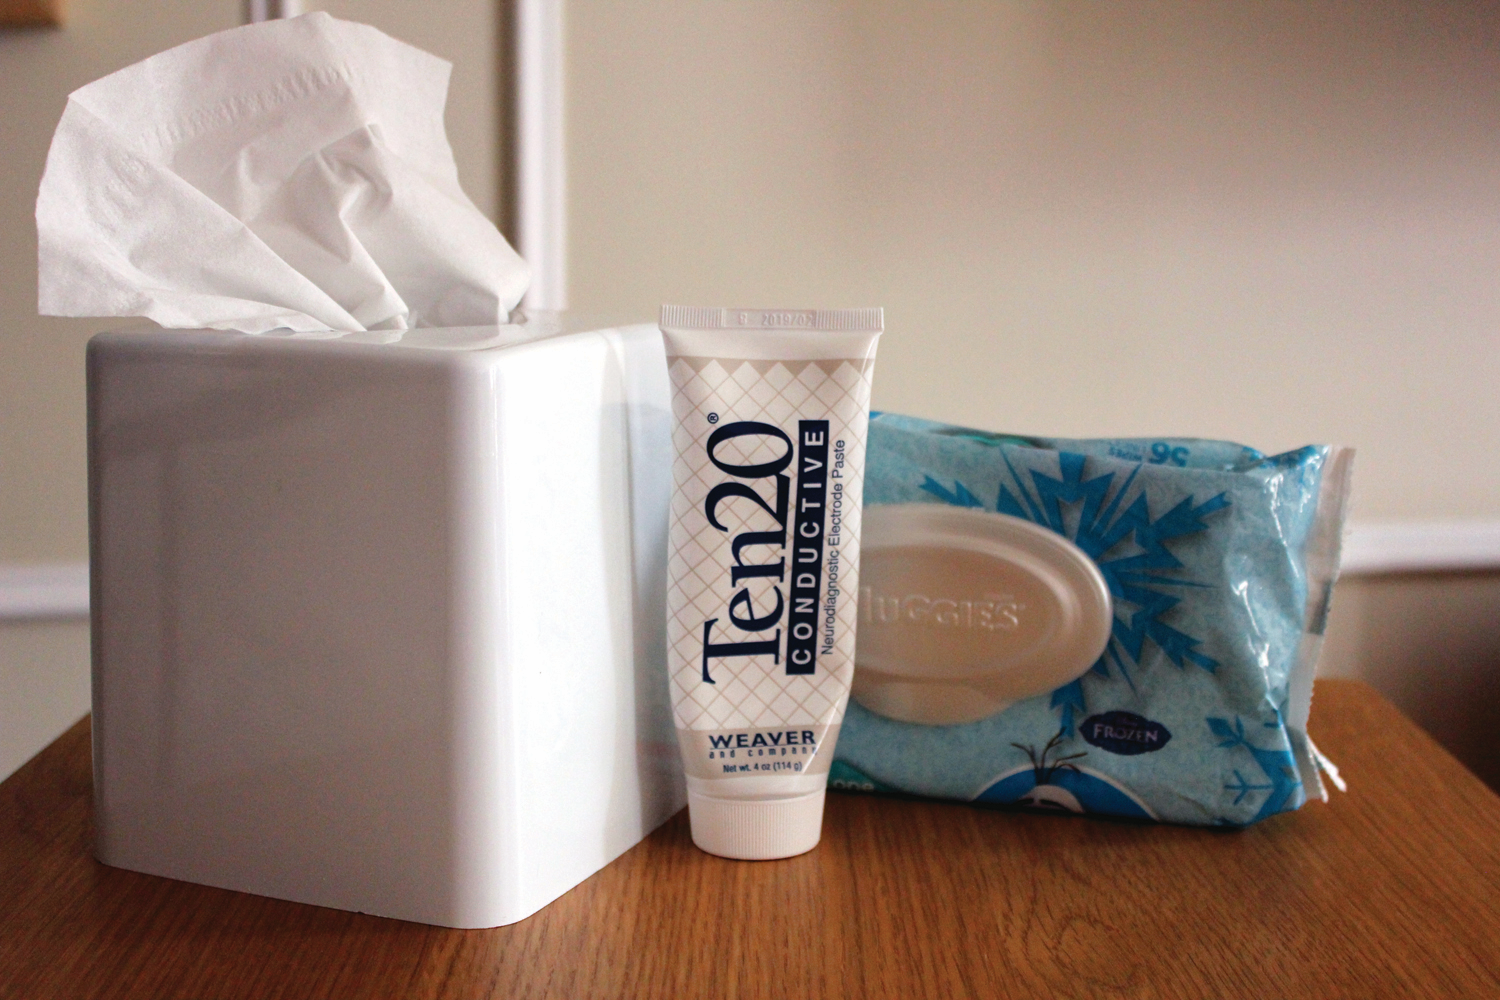
1. Before starting, have the following items handy: paste, tissues, and/or wipes.
2. Find the zAmp and separate the right and left sensors.
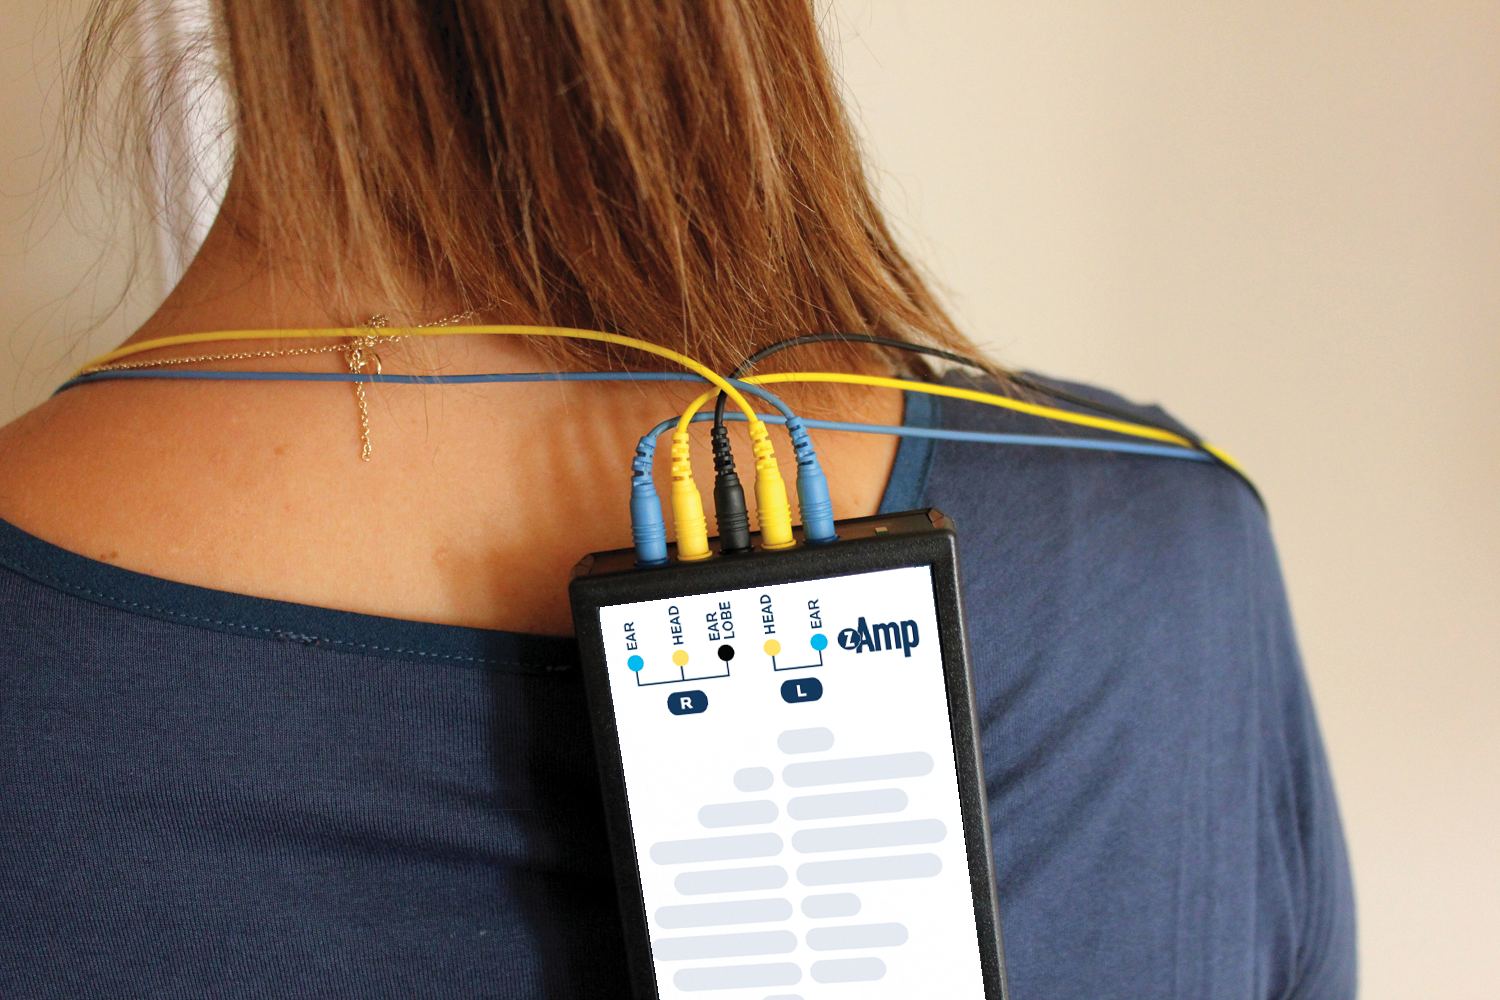
3. Place the zAmp in a comfortable spot. Hooked onto the front or back of a shirt or chair is common. Drape the left and right-side sensors over the corresponding shoulders.
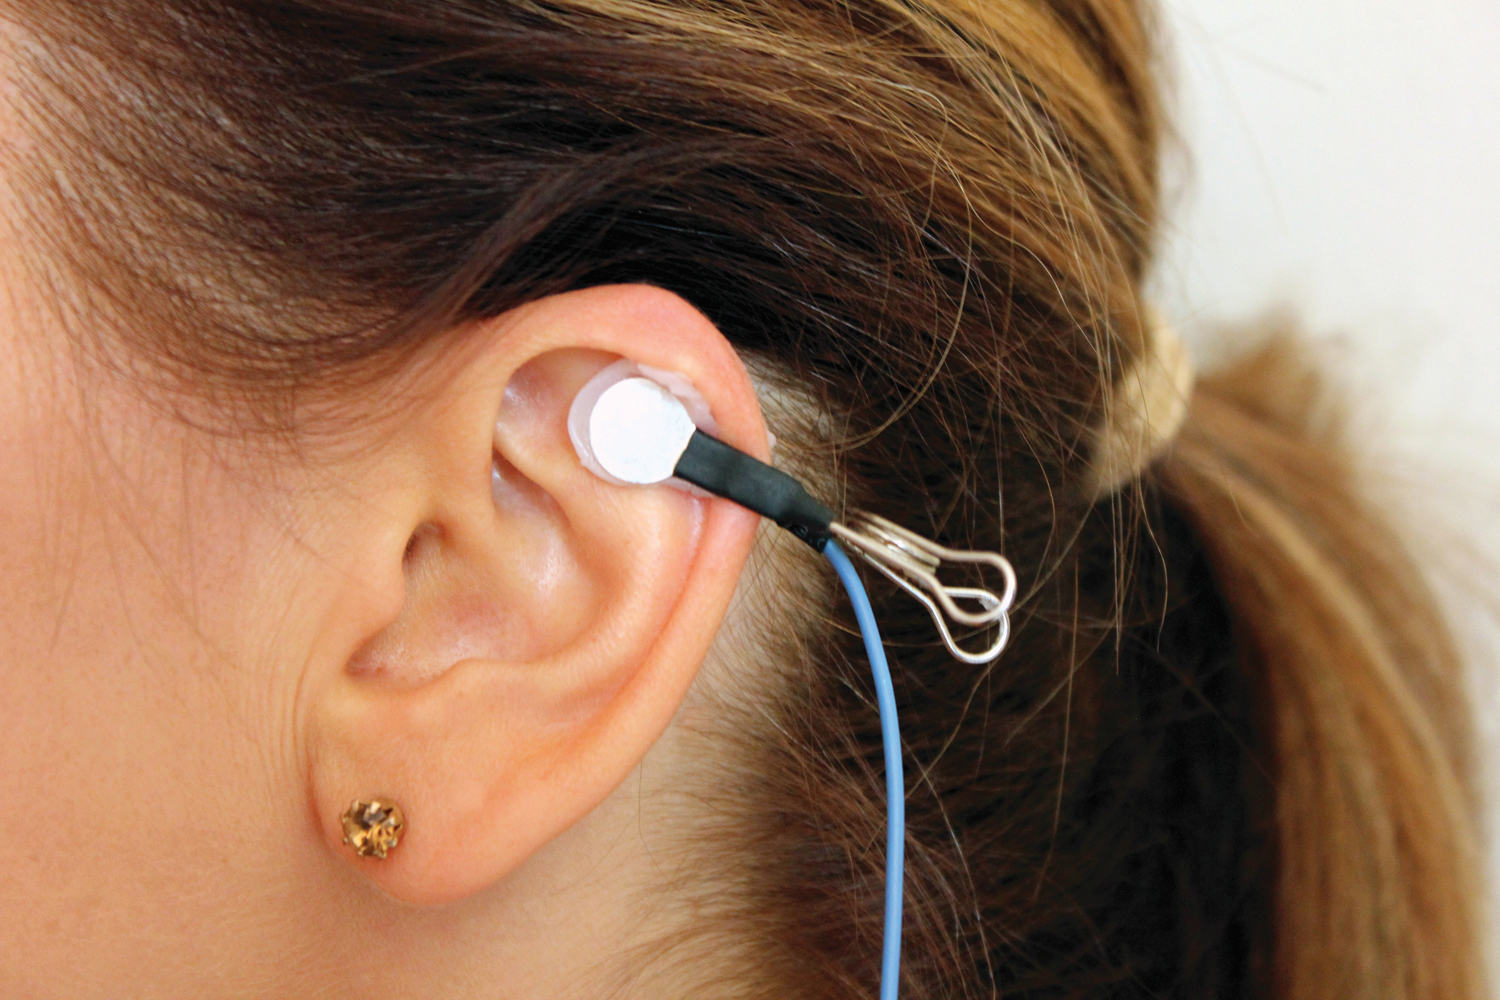
4. First, apply the right side. Press open the right blue clip.
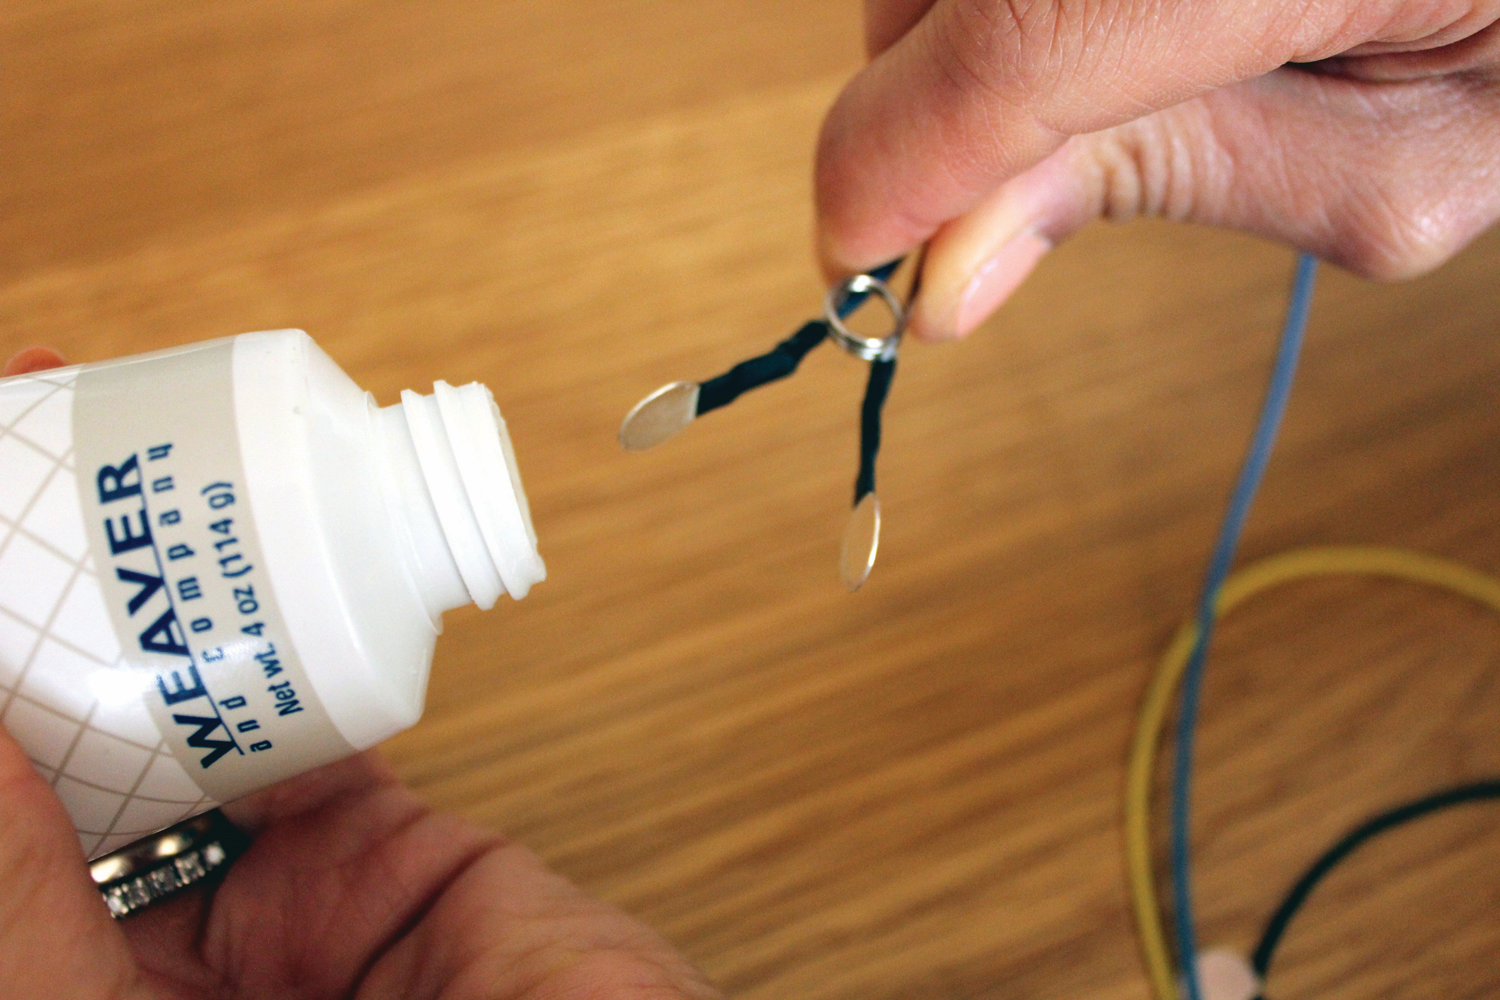
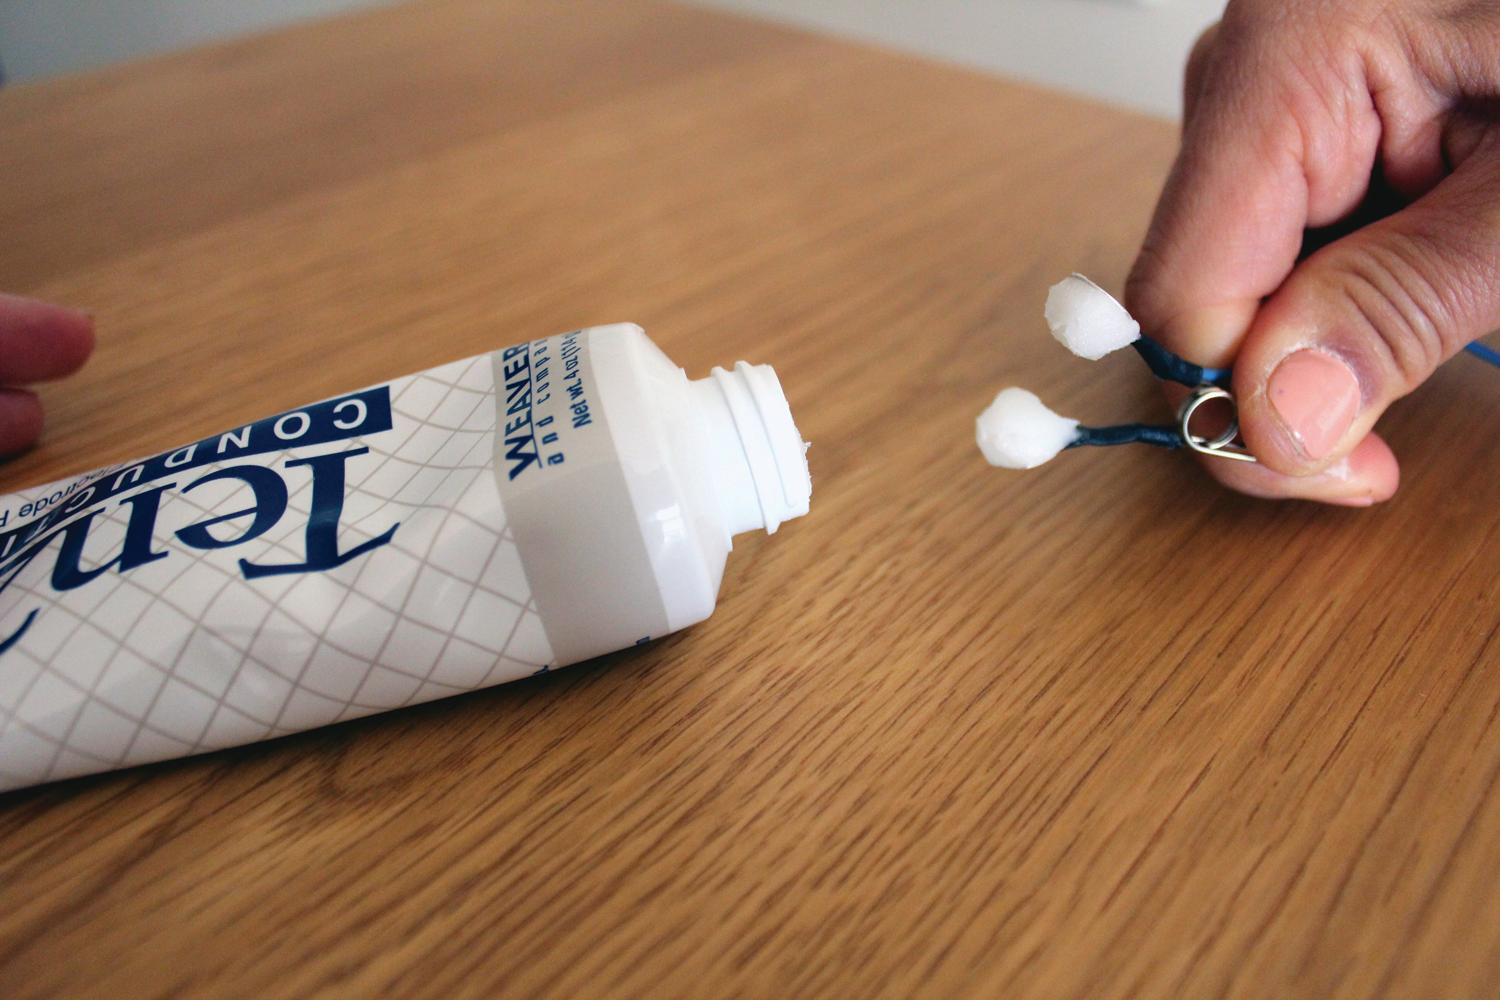
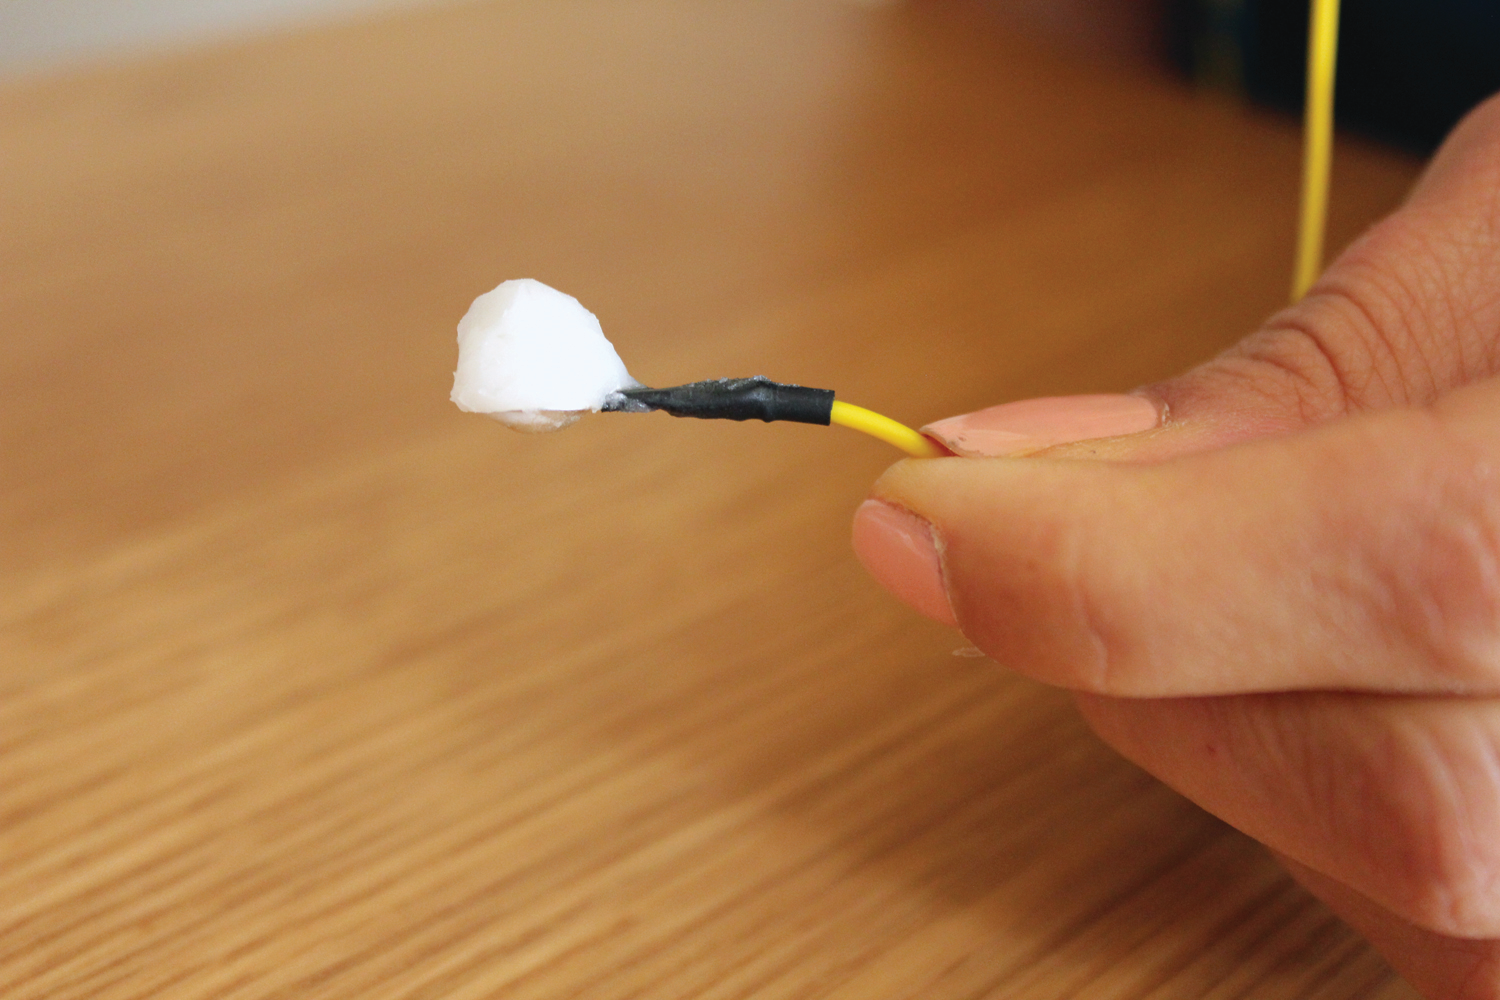
5. Scoop or squeeze paste onto sensors, so the paste resembles an ice cream scoop on both sides.
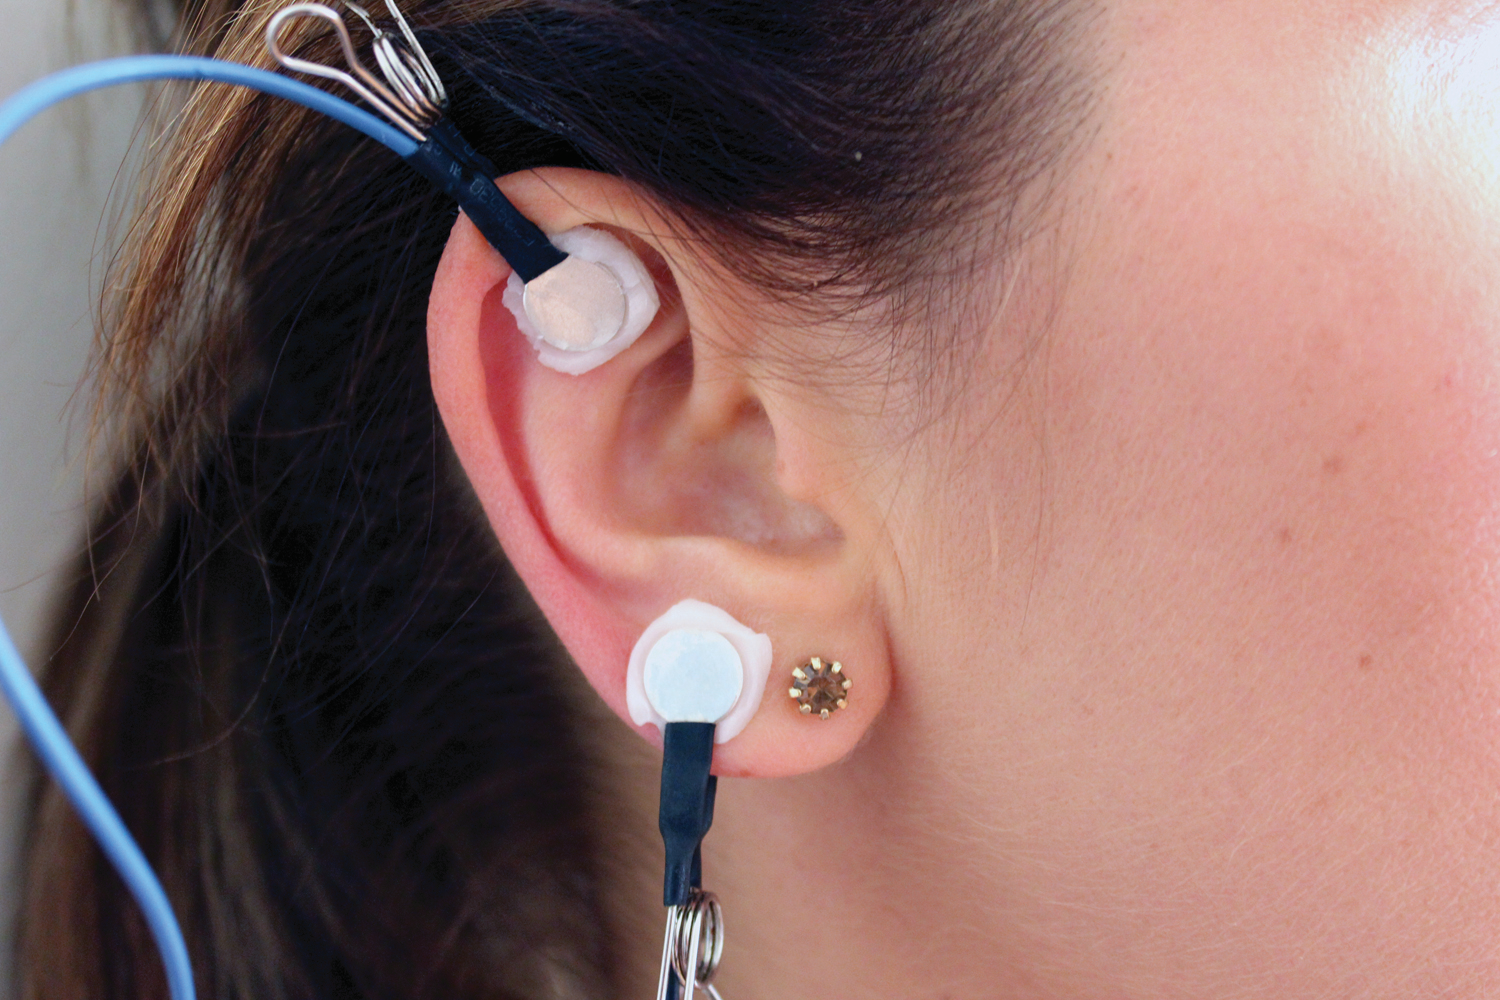
6. Press the clip onto the top of the right ear (some paste should ooze out, forming a ring).
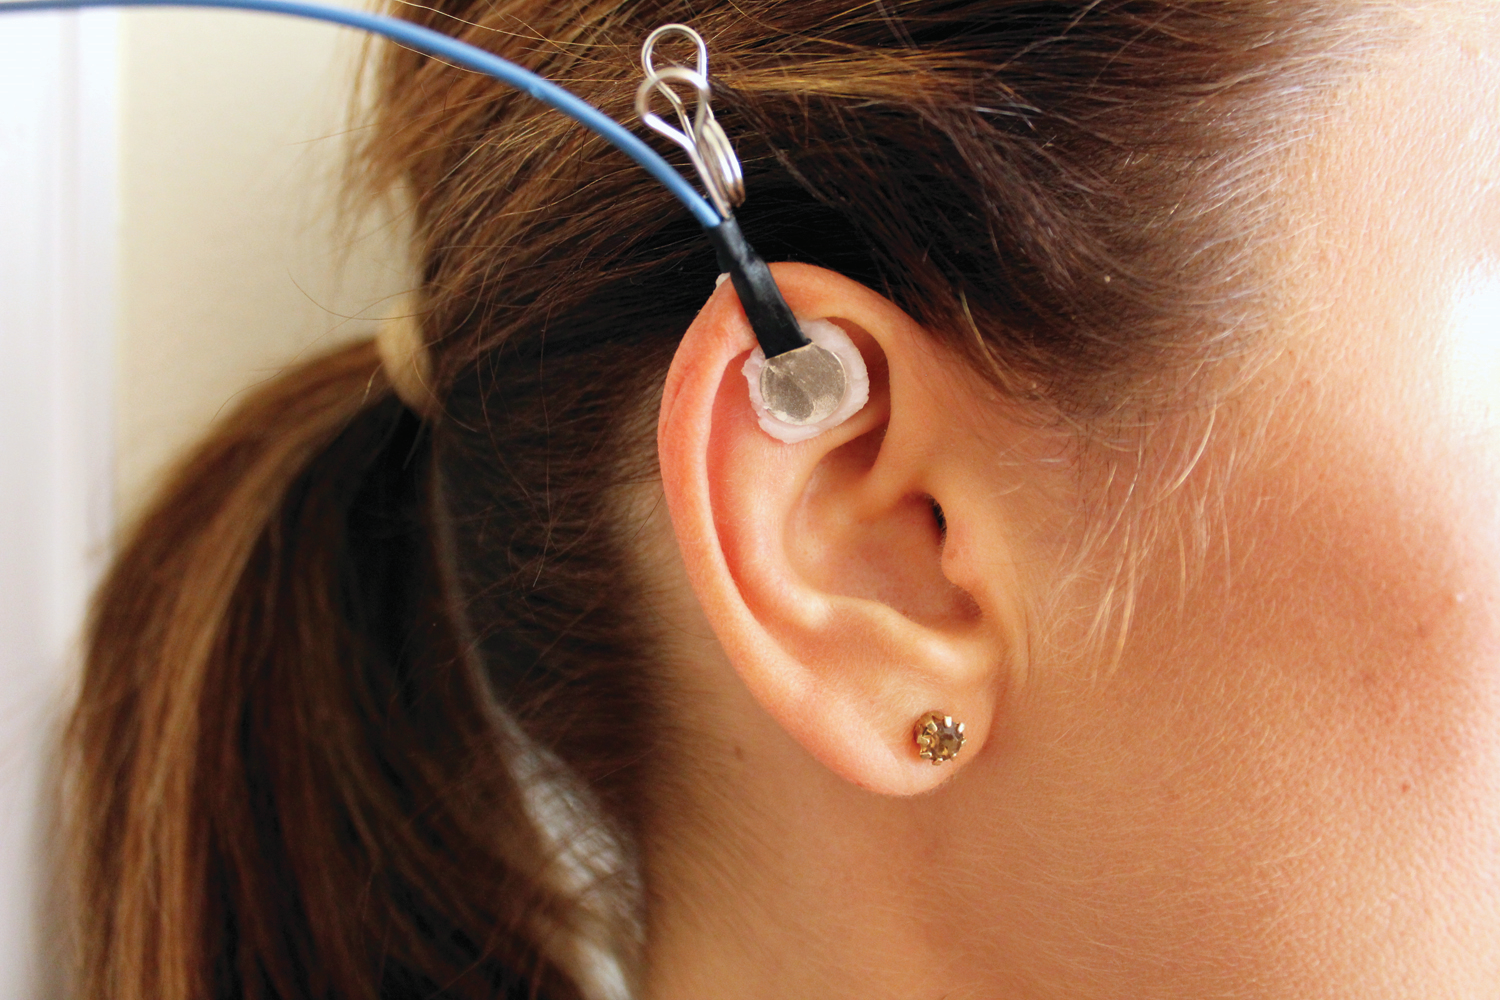
7. Apply paste in the same way to the black sensor clip and gently press onto the ear lobe. No need to remove earrings, just make sure the paste is not touching them. It is ok to adjust clip positioning to work around them.
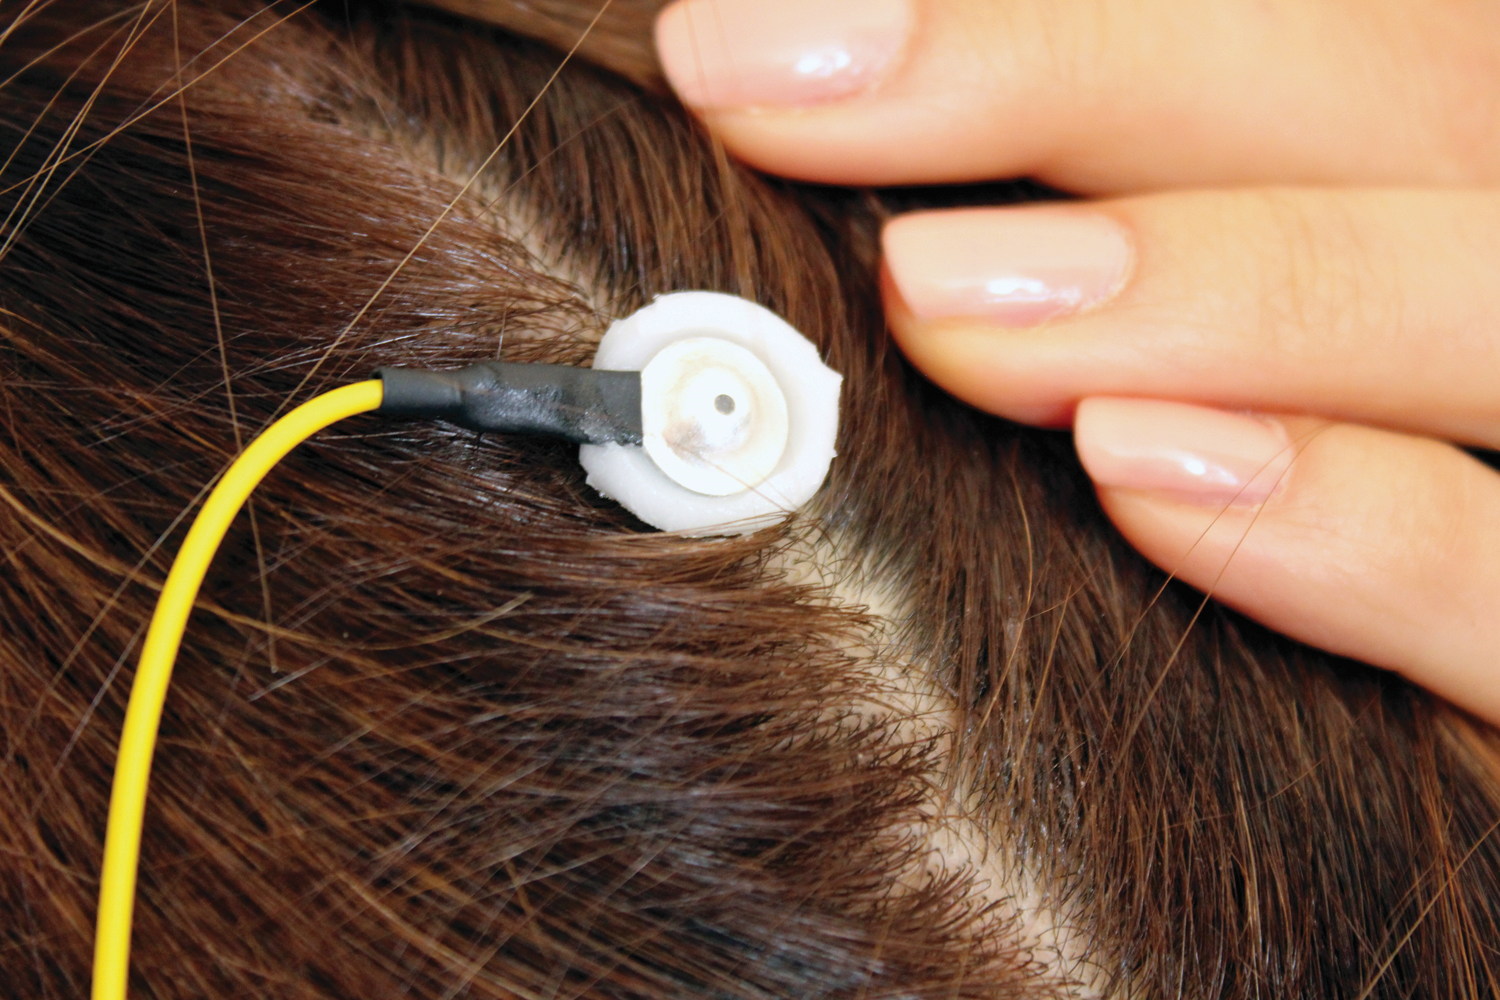
8. Pick up the yellow sensor and fill it with an ice cream scoopful of paste (be generous).
9A. If you slide your fingers over the scalp at the halfway point between the top of the ear and the top of the head, you will feel a bump with a dip right above it.
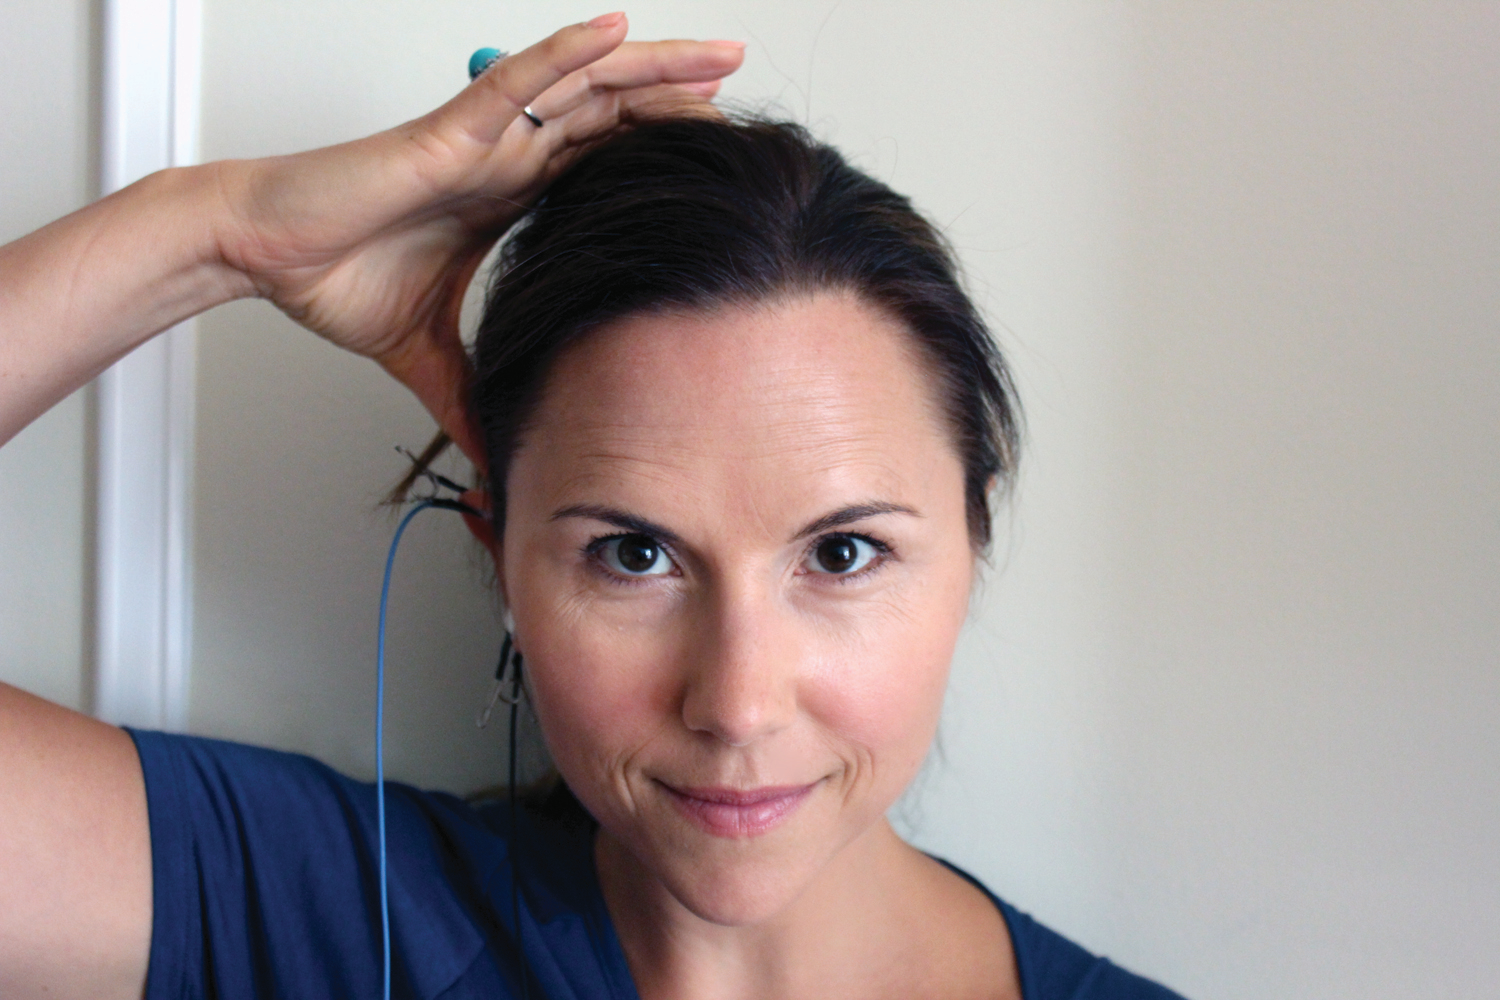
9B. That dip is your spot. If you can’t find a bump/dip, apply the sensor to the halfway point between the top of the ear and the top of the head.

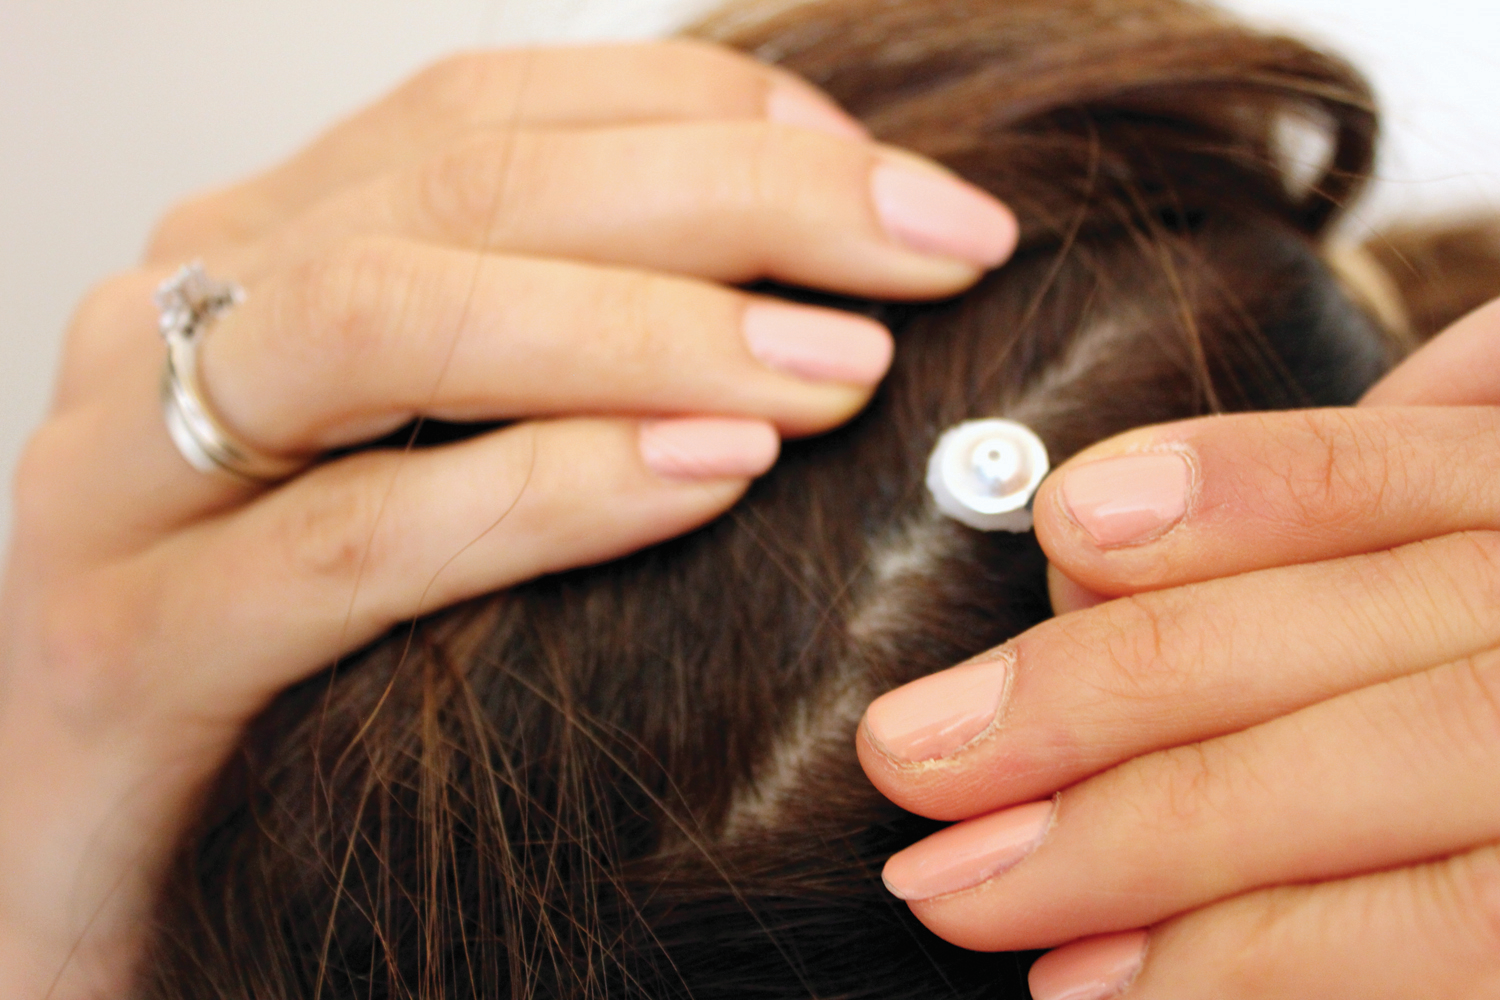
10. Cleanly part the hair exposing the scalp and press the sensor down firmly so a ring of paste forms. A good way to know if it is attached correctly is if it feels cool on the scalp.
11. Now apply the left side, similarly, attaching the blue clip to the top of the ear (the same way you did on the right side).
12. Find the dip above the midpoint between the top of the ear and the top of the head on the left side …
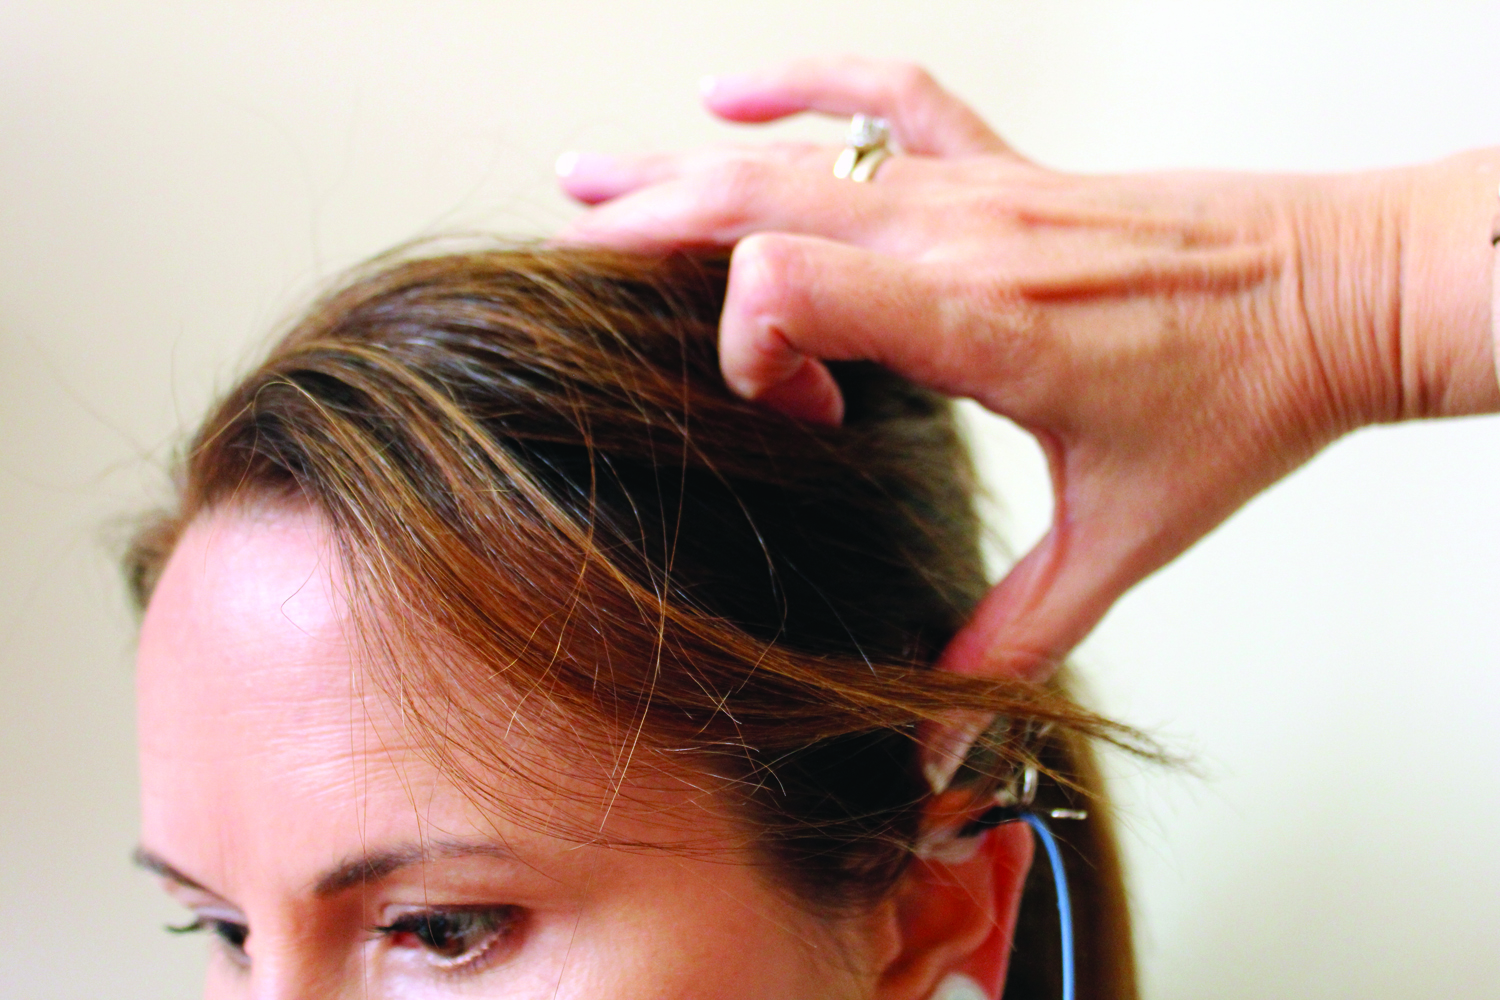
13. … and place the yellow sensor on the left side of the head (mirroring what you did on the right).
14. Well done! You are now ready to start your Session.

Running a Session
Launching NeurOptimal®
Watch video
1. NeurOptimal® requires an initial internet connection. If it is not connected, follow instructions on Connecting to Wi-Fi.
2. Launch NeurOptimal® by tapping the NeurOptimal® icon in the taskbar at the bottom of the screen.

3. There are four main windows in NeurOptimal®:
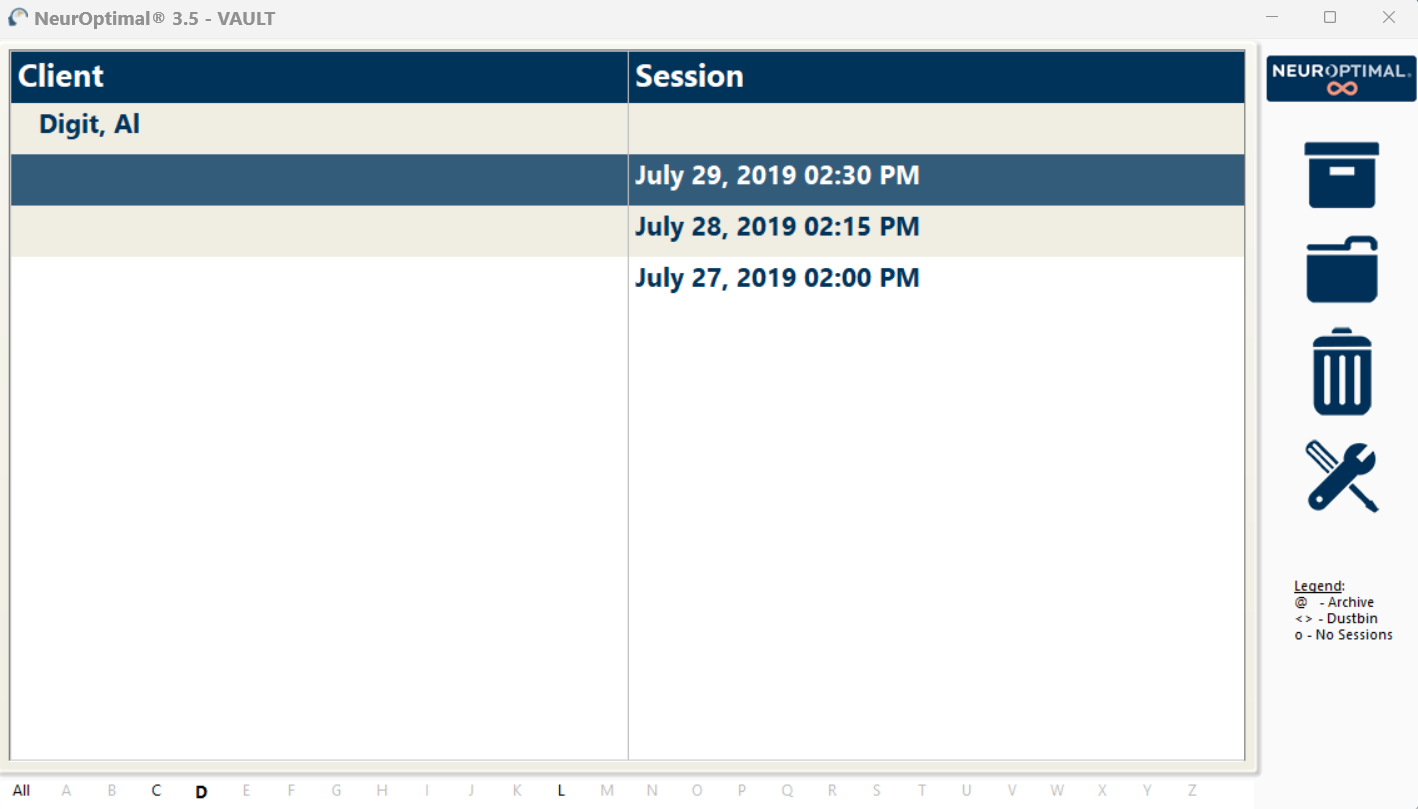
WINDOW 1 Vault: The VAULT is the command center for NeurOptimal® where you have control over everything when you’re not actively running a Session.
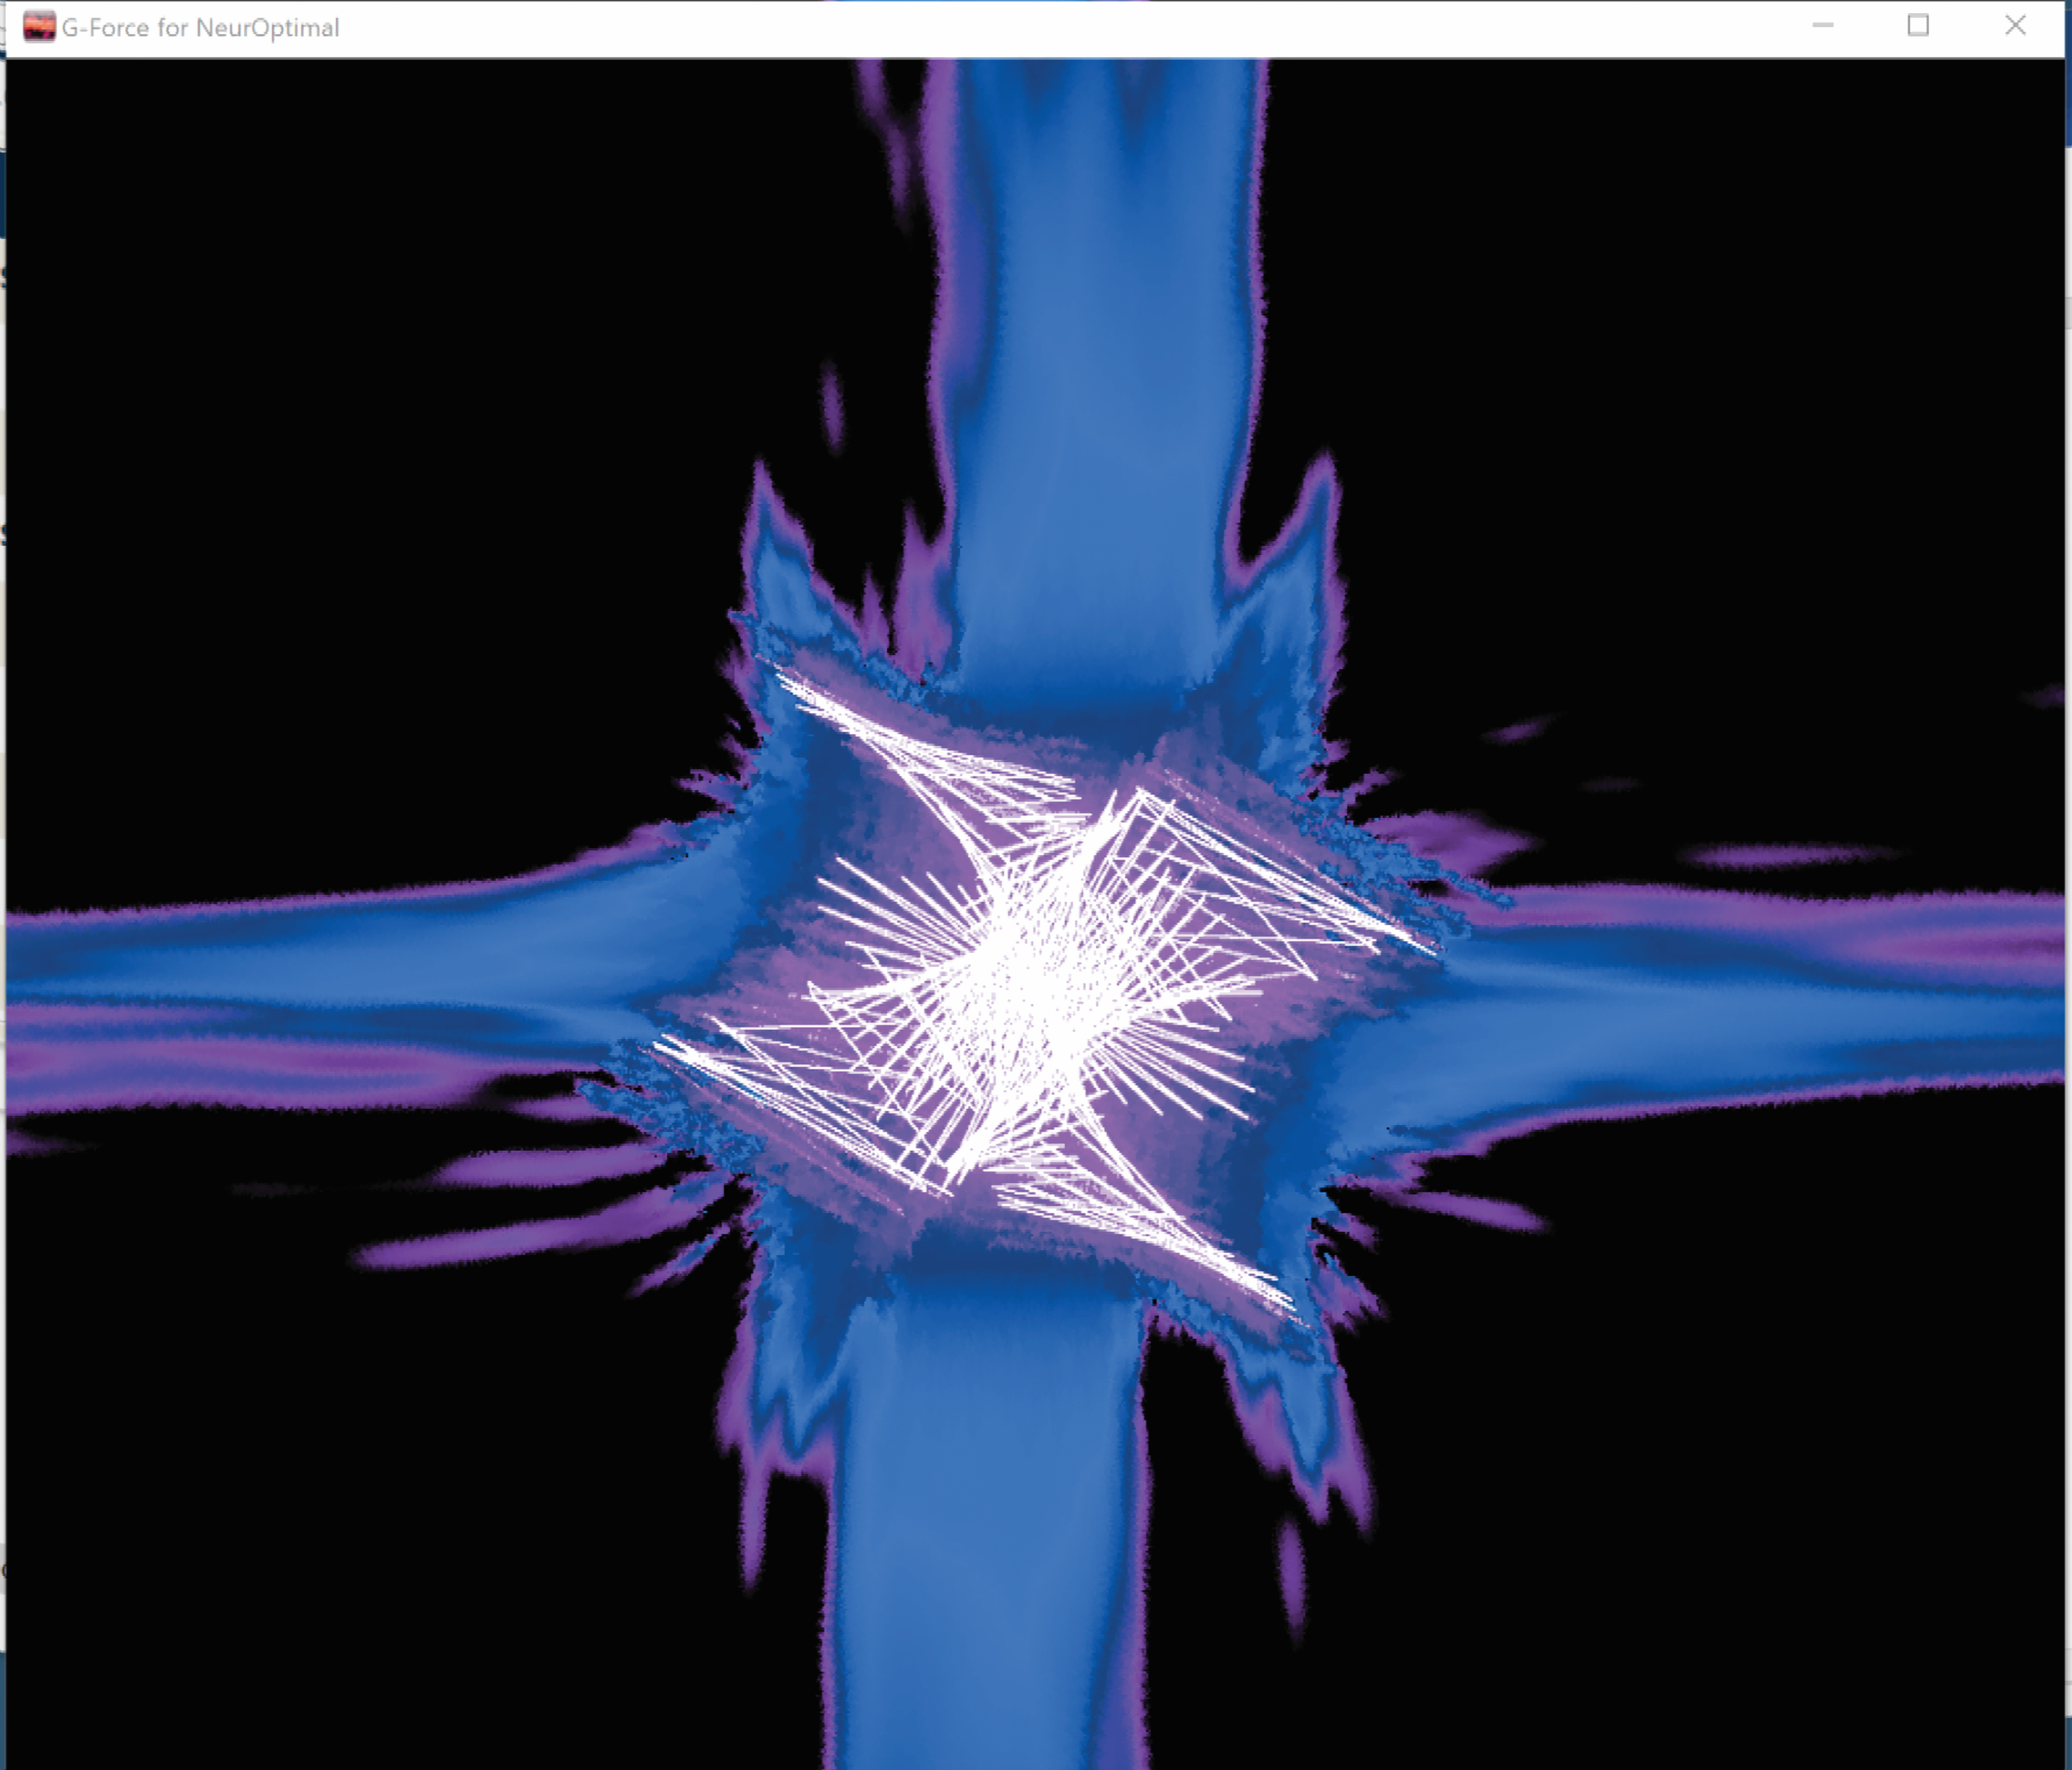
WINDOW 2 G-Force for NeurOptimal®: This is the window that is pulled to the external monitor (optional) during the Session and is what the client can watch throughout their Session if they choose.
WINDOW 3 NeurOptimal® Media Player (NOMP): This is the window you use to control the media during the Session.

WINDOW 4 Media Center: This window comes into play when using non-default audiovisual sources like movie files or DVDs.

Running a Session
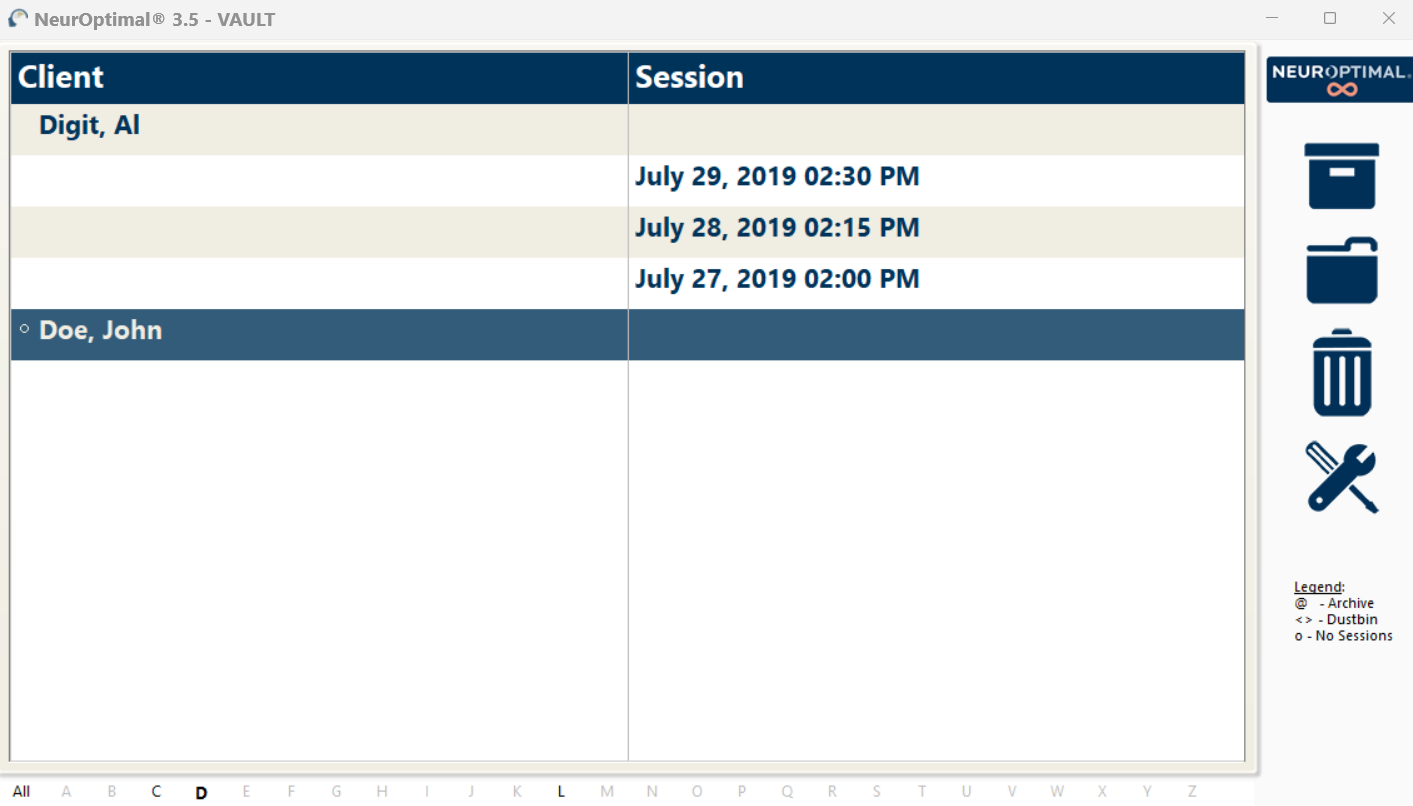
Navigating NeurOptimal®
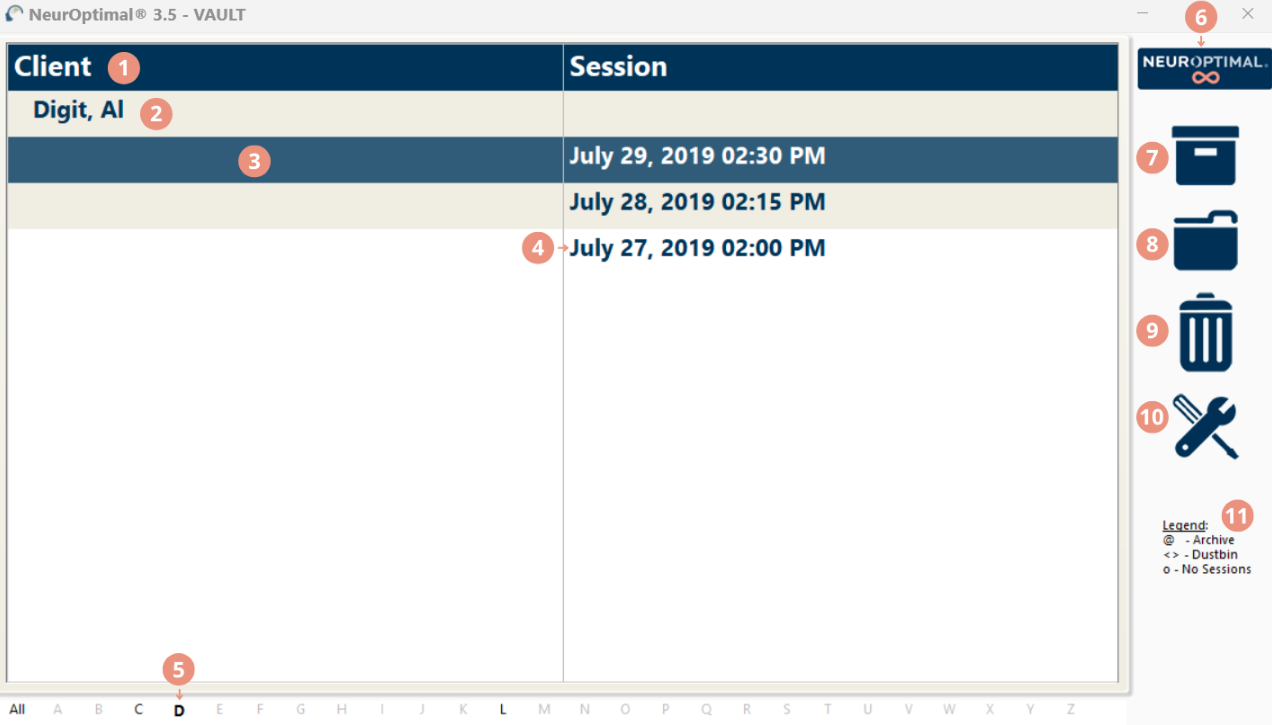
1 Header Line
2 Client Name
3 Highlighted Session
4 Session Date & Time
5 Active Client Index
6NeurOptimal® License Type
7 Archive
8 Move To
9 Dustbin
10 Tools
11 Legend
Navigating NeurOptimal® is easy. You can invoke responses in the VAULT two ways:
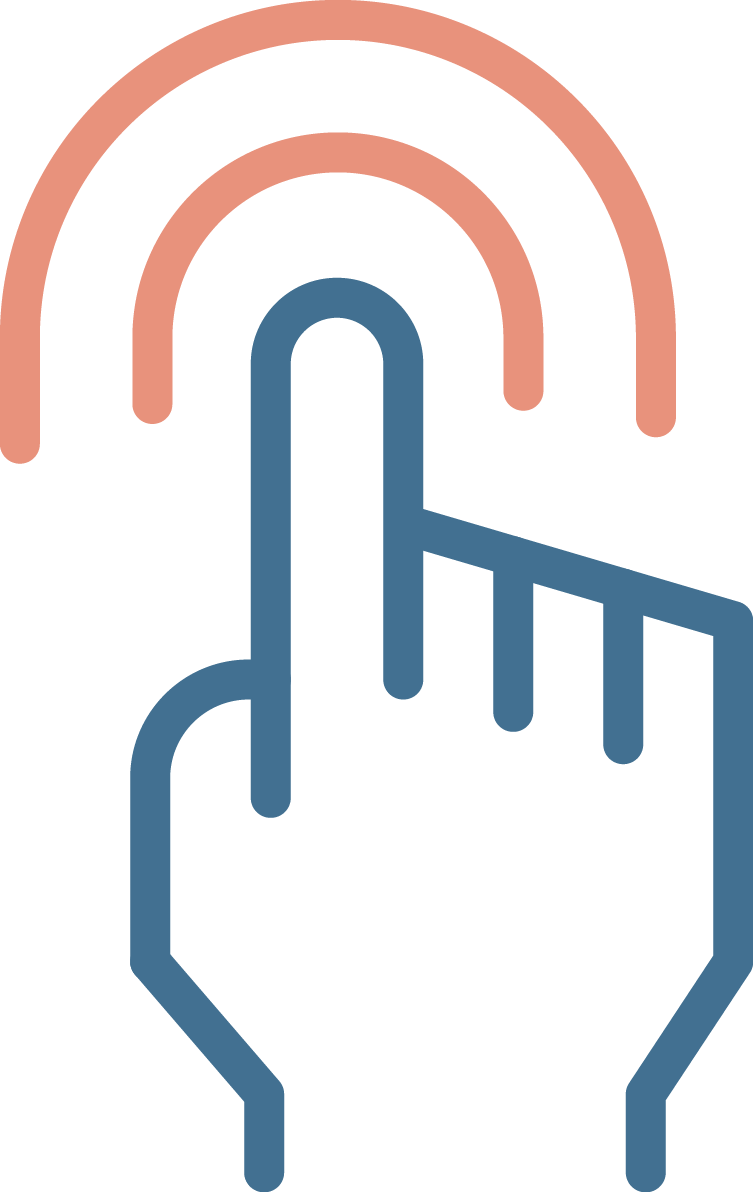
1. Touch and Hold: Touch the screen, leave your finger on it for a moment and then release. This will bring up a menu of actions that can be taken from there. This is the equivalent of a right click on a mouse.

2. Double Tap: Double tapping anywhere in the VAULT instantly launches its most common function.
Double Tap Cheat Sheet:
Running a Session
Starting a Session
Watch video
1. First, we will add the new Client. To do this, touch and hold (or right click) the word Client in the header and select Add a Client from the context menu OR simply double click on Client in the header.
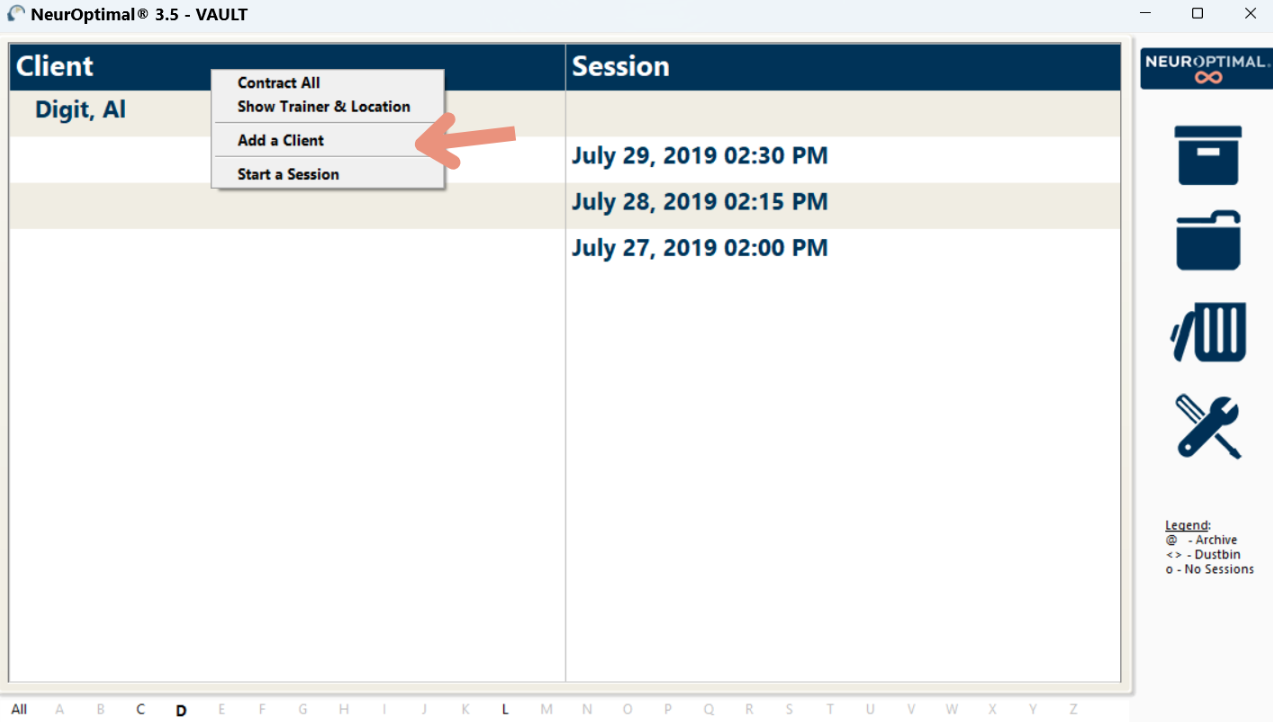
2. The Client Information window will appear.
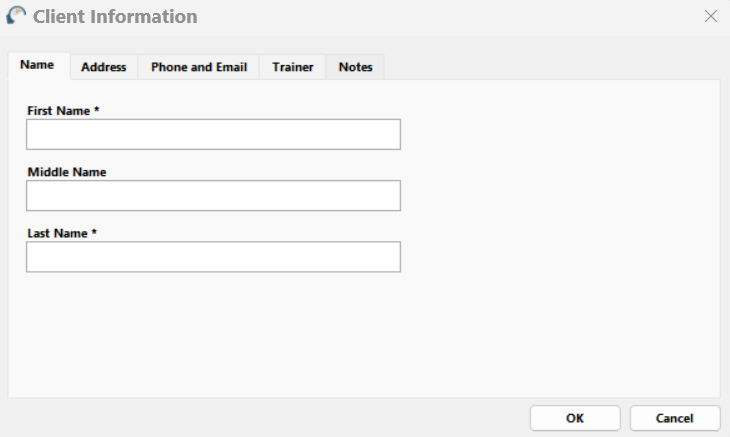
3. Enter as much or as little client information as you would like. The only required fields are the first and last name.
4. Select the Trainer tab. This is where you will assign a Trainer to the new Client you are adding.
A. Make sure the diamond is next to the Trainer you wish to be the Default Trainer for this Client.
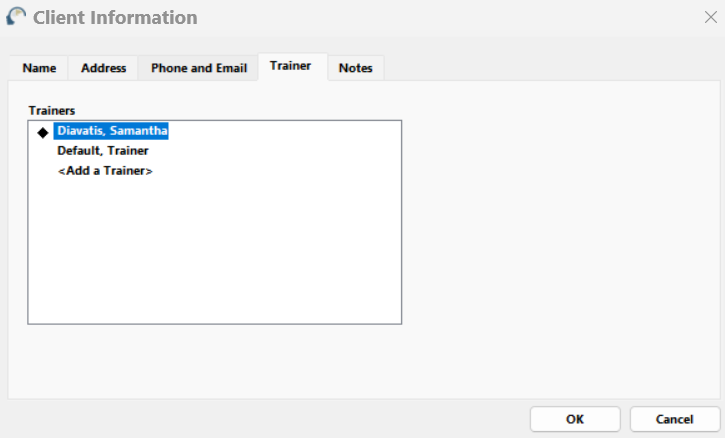
B. To change the Trainer that is selected, tap on the diamond so it disappears from the current selection.
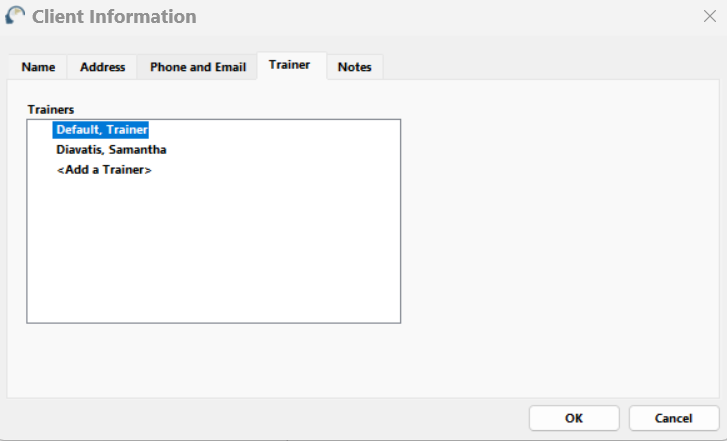
C. Tap on the Trainer name you wish to assign to the new Client. Tap OK to save.
D. You should now see the new Client listed. In this example, the new Client is Doe, John.
5. Double Tap or Double Click on the Client name to start a Session. You will know the Session properly started when… The VAULT disappears, the Matrix Mirror appears (unless deactivated in preferences), the music has begun, G-Force is invoked and the timers on the NOMP window have begun.
6. Click the speaker icon in the bottom-right corner to turn the sound on or off and adjust the volume.
IMPORTANT!
Feedback is provided via “interrupts” in the sound (music), making it imperative to keep the sound turned on.
CONGRATULATIONS!
You have successfully started a Session! To learn more about NeurOptimal®’s features, please view our video tutorials. To access, right click or tap and hold the Tools icon in the VAULT.
Removing the Sensors
1. Remove each sensor, trying to keep the paste clear of the hair as best you can. Be sure to clean the sensors of all paste with a tissue or wipe. Do not use alcohol or alcohol-based products.
2. Clean the ears and hair as best you can with a tissue or wipe. If working with a client, offer them a wipe to remove any remaining paste. The paste is removed easily with water.
3. To close NeurOptimal®, tap the x at the top right of the VAULT. To shut down the system, tap the Windows icon on the lower left of your screen and shut down from there.
NOTE:
It might seem challenging at first, but soon you will be able to do a hook up (on yourself or someone else) in less than a couple of minutes. You can have clients doing Sessions with time for a break in between, comfortably in hourly slots. NeurOptimal® allows you to run multiple clients concurrently if you wish, with each client at their own NeurOptimal® station.
CARE INSTRUCTIONS FOR SENSORS
To preserve the integrity of your sensors
1: CLEAN YOUR SENSORS IMMEDIATELY AFTER EACH SESSION: Clean your sensors gently yet thoroughly after each Session to prevent lingering paste, which can cause corrosion and reduce their lifespan. Use a damp soft cloth or baby wipe to clean them, and ensure they are thoroughly dried afterward. Do not use alcohol-based or chemical cleaners, as they will cause sensors to peel or crack and will void the warranty.
2: HANDLE WITH CARE WHEN APPLYING PASTE: When scooping paste, place your forefinger on the back of the sensor for support. This prevents bending and potential sensor damage.
3: AVOID TIGHT WIRING: Do not kink, braid, or wind your sensor wires tightly, as this can cause damage.
4: INSPECT SENSORS REGULARLY: Check your sensors regularly for any damage. If they are damaged in any way, replace them immediately. It’s a good practice to keep a backup set of sensors on hand.
5: ADJUST FOR COMFORT: Our sensors are designed to be malleable, so some misalignment or bending is normal. You can gently adjust them for better alignment or comfort.
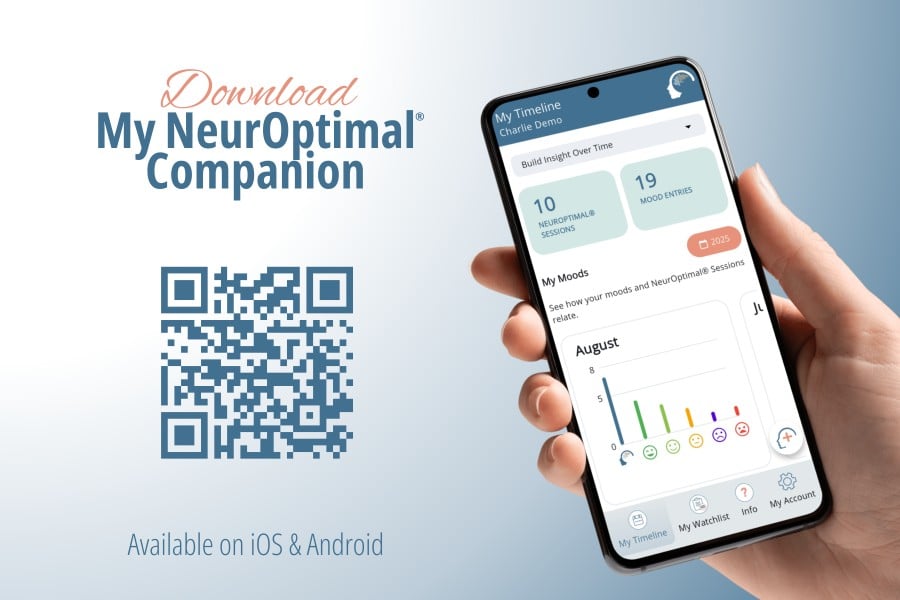
Track Your Journey with My NeurOptimal® Companion
A convenient way to observe shifts over time.
We’ve transformed our printable tools; My Journal Tracker (EN) (FR) and My Journal Checklist (EN) (FR) into a mobile app designed to support consistency and self-awareness throughout your NeurOptimal® experience.
Download My NeurOptimal® Companion, and:
- Log your training Sessions manually (dates and personal notes)
- Track changes in how you're feeling
- Capture reflections and observations
- View monthly summaries
- Build a personalized watchlist
- Use it in 5 languages: English, French, Spanish, Italian, and Dutch
"How people are feeling is what brings them through the door, so how they are feeling is therefore the most important data point."
Visit our official app landing page and download My NeurOptimal® Companion today.
Additional Information
Important Tips
1. Internet Connection: NeurOptimal® must connect to the Internet at least once every 7 days to authenticate your software license. A constant Internet connection is recommended so your system can receive essential Windows and NeurOptimal® updates.
2. Warranty Information: Your NeurOptimal® system and zAmp amplifier are covered under separate warranties. For full details on coverage, registration, and support, please visit our Warranty Page and Terms & Conditions.
3. Windows Updates: Keeping your Windows Operating System updated is essential for optimal performance. For update instructions and best practices, please refer to our System Maintenance FAQ.
4. Operating System Language: Please do not change the Windows language, date, or time settings. Modifying these can interfere with NeurOptimal®’s operation.
5. Restoring G-Force: If the G-Force display is missing after a system update or adjustment, it can be easily restored by following the steps outlined in our Technical FAQ.
Additional Information
Key Contacts
Contact UsResource Guide
Video Tutorials in the NeurOptimal® VAULT
 PASS Tools & Resources
 New User Webinars
 PASS Webinars
 Certification Courses
 Business Building Webinars
 ZenConnect
This equipment has been tested and found to comply with the limits for a Class B digital device, pursuant to Part 15 of the FCC Rules. These limits are designed to provide reasonable protection against harmful interference in a residential installation. This equipment generates, uses and can radiate radio frequency energy and, if not installed and used in accordance with the instructions, may cause harmful interference to radio communications. However, there is no guarantee that interference will not occur in a particular installation. If this equipment does cause harmful interference to radio or television reception, which can be determined by turning the equipment off and on, the user is encouraged to try to correct the interference by one or more of the following measures: 1. Reorient or relocate the receiving antenna. 2. Increase the separation between the equipment and receiver. 3. Connect the equipment into an outlet on a circuit different from that to which the receiver is connected. 4. Consult an experienced radio/TV technician for help.